Adding and Replacing Parts 87
NOTICE: The connectors are keyed to ensure correct insertion. If you feel resistance, check the
connectors and realign the card.
6
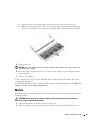
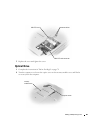
Align the modem with the screw holes and press the modem into the connector on the system
board.
7
Install the screws to secure the modem to the system board.
8
Replace the cover.
Mini PCI Card
CAUTION: FCC rules strictly prohibit users from installing 5-GHz (802.11a, 802.11a/b, 802.11a/b/g)
Wireless LAN Mini PCI cards. Under no circumstances should the user install such a device. Only
trained Dell service personnel are authorized to install a 5-GHz Wireless LAN Mini PCI card.
If you are removing and/or installing a 2.4-GHz (802.11b, 802.11b/g) Mini PCI Card, follow the
instructions noted below. Only products approved for use in your portable computer may be installed.
Approved Mini PCI Cards may be purchased only from Dell.
NOTE: 2.4-GHz Wireless LAN PC Cards may be removed and installed by the user. If you ordered a Mini
PCI card with your computer, the card is already installed.
CAUTION: Before you begin any of the procedures in this section, follow the safety instructions
located in the Product Information Guide.
1
Follow the procedures in "Before You Begin" on page 79.
2
Turn the computer over.
3
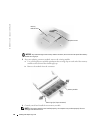
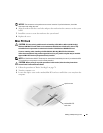
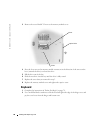
Loosen the captive screw on the modem/Mini PCI card cover and lift the cover away from the
computer.
captive screw
modem/Mini PCI
card cover


