


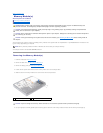

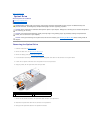

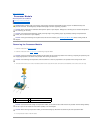
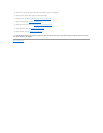

10. Remove the four screws that secure the optical-drive bracket to the optical drive.
11. Using the pull-tab, lift the optical-drive bracket off the optical drive.
Replacing the Optical Drive
1. Follow the instructions in Before You Begin.
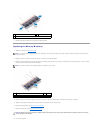
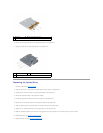
2. Align the screw holes on the optical-drive bracket with the screw holes on the optical drive.
3. Replace the four screws that secure the optical-drive bracket to the optical drive.
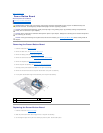
4. Adhere the optical-drive cable to the optical-drive bracket.
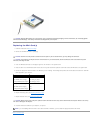
5. Connect the optical-drive cable connector to the connector on the optical drive.
6. Replace the two screws that secure the the optical-drive cable to the optical drive.
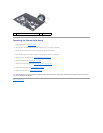
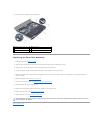
7. Align the captive screws on the optical drive with the screw holes on the computer base.
8. Tighten the four captive screws that secure the optical drive to the computer base.
9. Slide the optical-drive cable into the connector on the system board, and press down on the connector latch to secure the cable.
10. Replace the battery (see Replacing the Battery Pack).
11. Replace the base cover (see Removing the Base Cover).
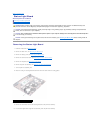
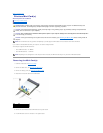
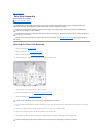
1
screws (2)
2
optical-drive cable connector
3
optical-drive cable
1
screws (4)
2
optical-drive bracket
3
pull tab