


172 Adding and Replacing Parts
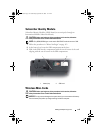
Keyboard
For more information about the keyboard, see "Using the Keyboard and
Touch Pad" on page 49.
CAUTION: Before you begin any of the procedures in this section, follow the
safety instructions in the Product Information Guide.
NOTICE: To avoid electrostatic discharge, ground yourself by using a wrist
grounding strap or by periodically touching an unpainted metal surface (such as a
connector on the back of the computer).
NOTICE: To help prevent damage to the system board, you must remove the battery
from the battery bay before you begin working inside the computer.
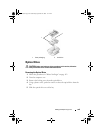
Removing the Keyboard
1
Follow the procedures in "Before You Begin" on page 163.
2
Remove the central control cover (see "Central Control Cover" on
page 170).
3
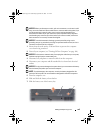
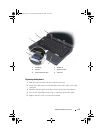
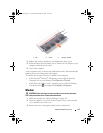
Remove the two screws at the top of the keyboard.
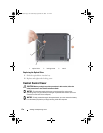
NOTICE: The key caps on the keyboard are fragile, easily dislodged, and time-
consuming to replace. Be careful when removing and handling the keyboard.
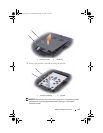
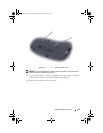
4
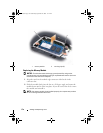
Lift the keyboard and hold it up and slightly forward to access the keyboard
connector.
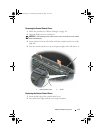
5
Rotate the keyboard connector latch towards the front of the computer to
disconnect the keyboard cable from the keyboard connector on the system
board.
6
Slide the keyboard cable out of the keyboard connector.
book.book Page 172 Wednesday, September 16, 2009 11:12 AM