


Installing Drives 10-11
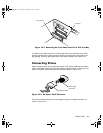
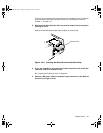
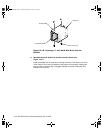
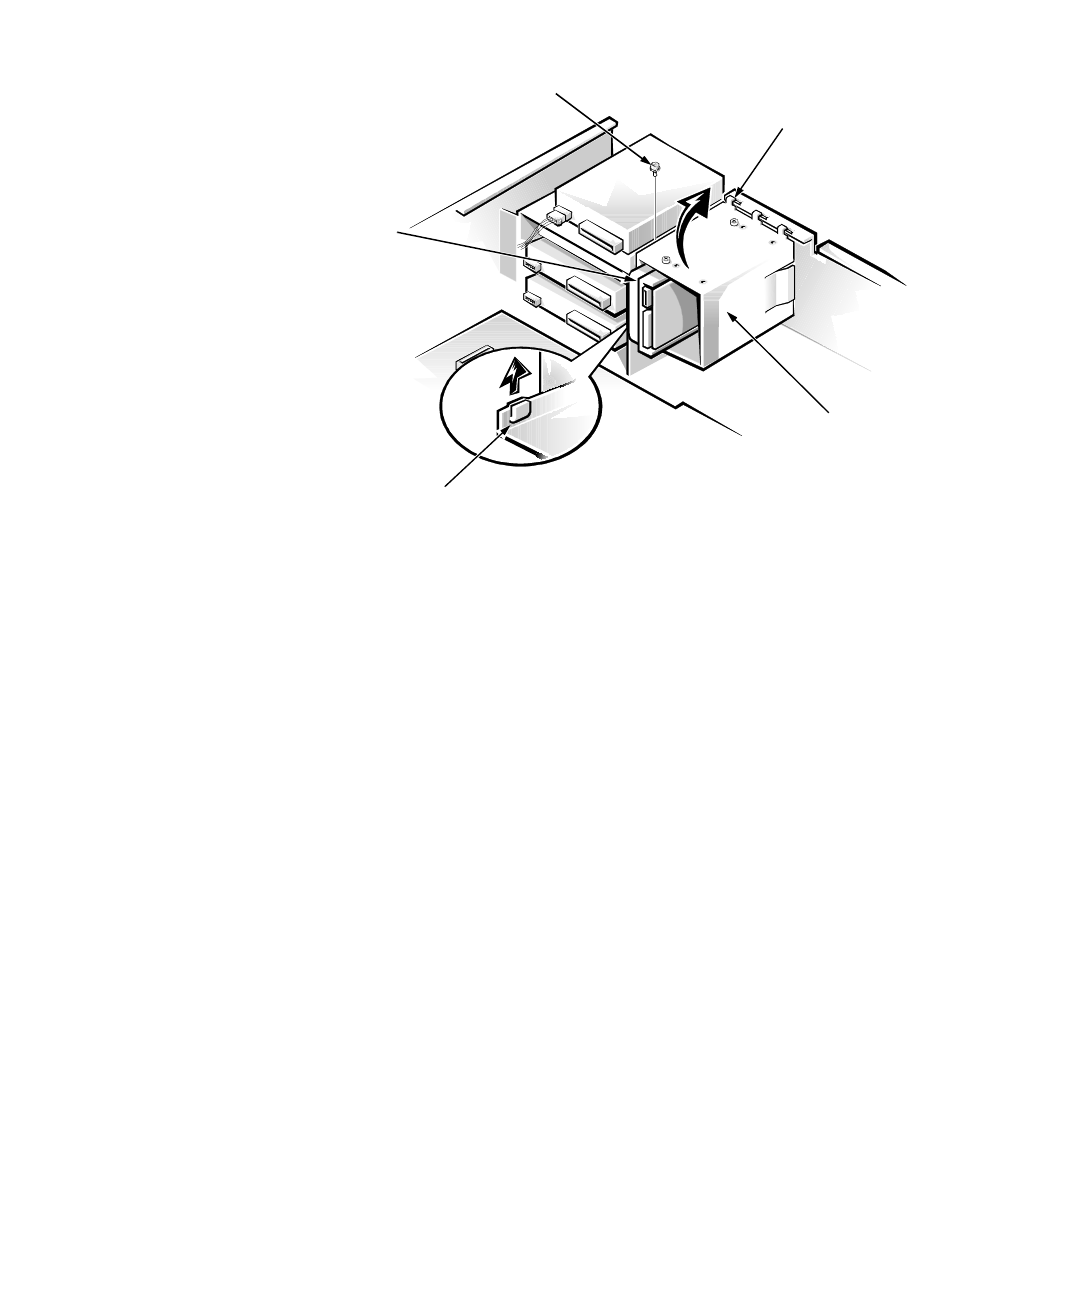
)LJXUH5HPRYLQJWKH+DUG'LVN'ULYH%UDFNHW
5HPRYHWKHGULYHEUDFNHWIURPWKHFKDVVLV
If any hard-disk drives are already installed in the bracket, disconnect the DC
power cable and interface cable from each drive.
Remove the screw holding the drive bracket to the drive bay. Lift up on the drive
bracket to disengage it from the latch on the drive bay and the three hooks on the
front of the chassis (see Figure 10-9). Remove the bracket.
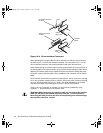
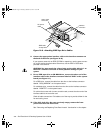
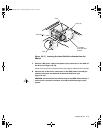
6OLGHWKHGULYHLQW RWKHFKRV HQ ED\ RIWK HEUDFNHWRULHQ WLQJ LWVR WK D W
WKHF RQQHFWRUV RQWKHEDF N RIWK H GULYHIDFH WKHLQ VLGHRIWK H FKDV VLV
ZKHQWKHEUDFNHWLVUHLQVWDOOHGDQGVRWKDWWKHGULYHLVLQWKHOHIWPRVW
SRVLWLR Q LQWKH EUDFNHWVH H)LJX UH
You must install a drive in the primary drive bay. The primary drive bay is the left-
most bay in the bracket and is marked as “HD1” on the top surface of the
bracket. The secondary drive bay is marked as “HD2.”
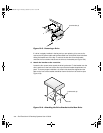
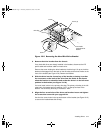
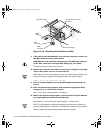
$OLJQW K H IR XUVFUHZ K ROHVR IWKHGULYHDQGEUDFNHW,QVH UWDQGWLJK WH Q
WKHV FU HZVWK DW FDPHZLWK\R XU XSJUDGHNLW
Use the four screw holes in the top and bottom of the bracket (see Figure 10-10)
to secure the installed hard-disk drive(s).
hooks (3)
removable
hard-disk drive
bracket
latch
screw
drive bay
23186bk0.bk Page 11 Thursday, October 29, 1998 11:07 AM