


2 Hardware Installation D-Link Web Smart Switch User Manual
Then, u
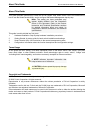
se the screws provided with the equipment rack to mount the switch in the rack.
Figure 2.3 – Mount the Switch in the rack or chassis
Please be aware of following safety Instructions when installing:
t in an environment compatible with the maximum ambient temperature (Tma)
pecified by the manufacturer.
ould be such that the amount of air flow
quired for safe operation of the equipment is not compromised.
in the rack should be such that a hazardous condition is
ot achieved due to uneven mechanical loading.
g.
ppropriate consideration of equipment nameplate ratings should be used when addressing this concern.
e given to supply connections other than direct connections to the branch circuit (e.g. use
f power strips)."
A) Elevated Operating Ambient - If installed in a closed or multi-unit rack assembly, the operating ambient
temperature of the rack environment may be greater than room ambient. Therefore, consideration should be
given to installing the equipmen
s
B) Reduced Air Flow - Installation of the equipment in a rack sh
re
C) Mechanical Loading - Mounting of the equipment
n
D) Circuit Overloading - Consideration should be given to the connection of the equipment to the supply
circuit, and the effect that overloading of the circuits might have on overcurrent protection and supply wirin
A
E) Reliable Earthing - Reliable earthing of rack-mounted equipment should be maintained. Particular
attention should b
o
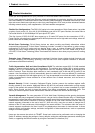
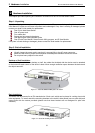
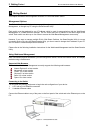
Step 3 – Plugging in the AC Power Cord
Users may now connect the AC power cord into the rear of the switch and to an electrical outlet (preferably
one that is grounded and surge protected).
Figure 2.4 –Plugging the switch into an outlet
7
7