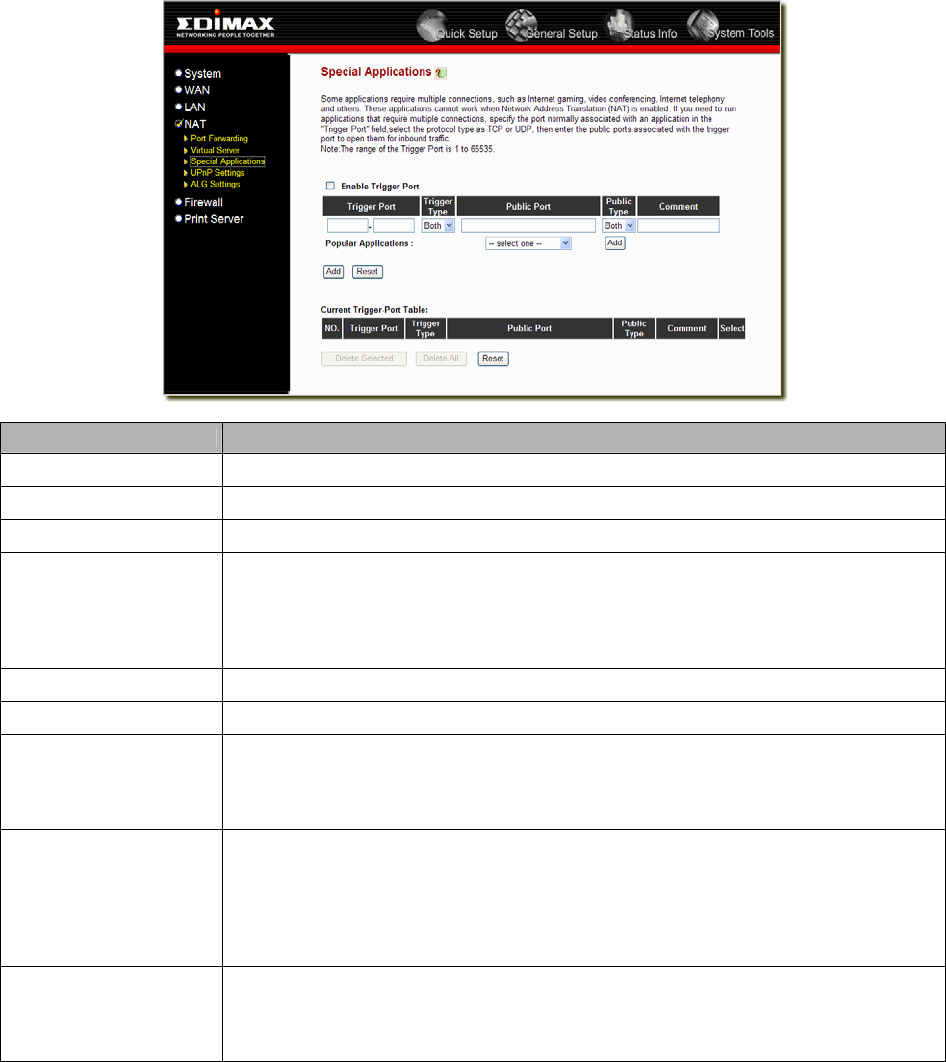
2.4.3 Special Applications
Some applications require multiple connections, such as Internet games, video conferencing, Internet telephony and others.
In this section you can configure the router to support multiple connections for these types of applications.
Parameter Description
Enable Trigger Port Enable the Special Application function.
Trigger Port This is the out going (Outbound) range of port numbers for this particular application
Trigger Type Select whether the outbound port protocol is “TCP”, “UDP” or both.
Public Port
Enter the In-coming (Inbound) port or port range for this type of application (e.g. 2300-
2400, 47624)
Note: Individual port numbers are separated by a comma
(e.g. 47624, 5775, 6541 etc.). To input a port range use a “dash” to separate the two port
number range (e.g. 2300-2400)
Public Type Select the Inbound port protocol type: “TCP”, “UDP” or both
Comment The description of this setting.
Popular applications
This section lists the more popular applications that require multiple connections. Select
an application from the Popular Applications selection. Once you have selected an
application, click the Add button. This will automatically copy the Port Trigger information
required for this popular application in into the input fields.
Add Special Application
Fill in the "Trigger Port", "Trigger Type”, “Public Port”, "Public Type", "Public Port" and
"Comment" of the setting to be added and then click "Add". Then this Special Application
setting will be added into the "Current Trigger-Port Table" below. If you find any typo
before adding it and want to retype again, just click "Clear" and the fields will be cleared.
If you want to add a popular application, select one “Popular Application” and then click
“Add”.
Remove Special
Application
If you want to remove some Special Application settings from the " Current Trigger-Port
Table", select the Special Application settings you want to remove in the table and then
click "Delete Selected". If you want remove all Special Appliacation settings from the
table, just click "Delete All" button. Click "Reset" will clear your current selections.
Click <Apply> at the bottom of the screen to save the above configurations. You can now configure other advance sections
or start using the router (with the advance settings in place)
30


