Welcome 11
Optional Accessories
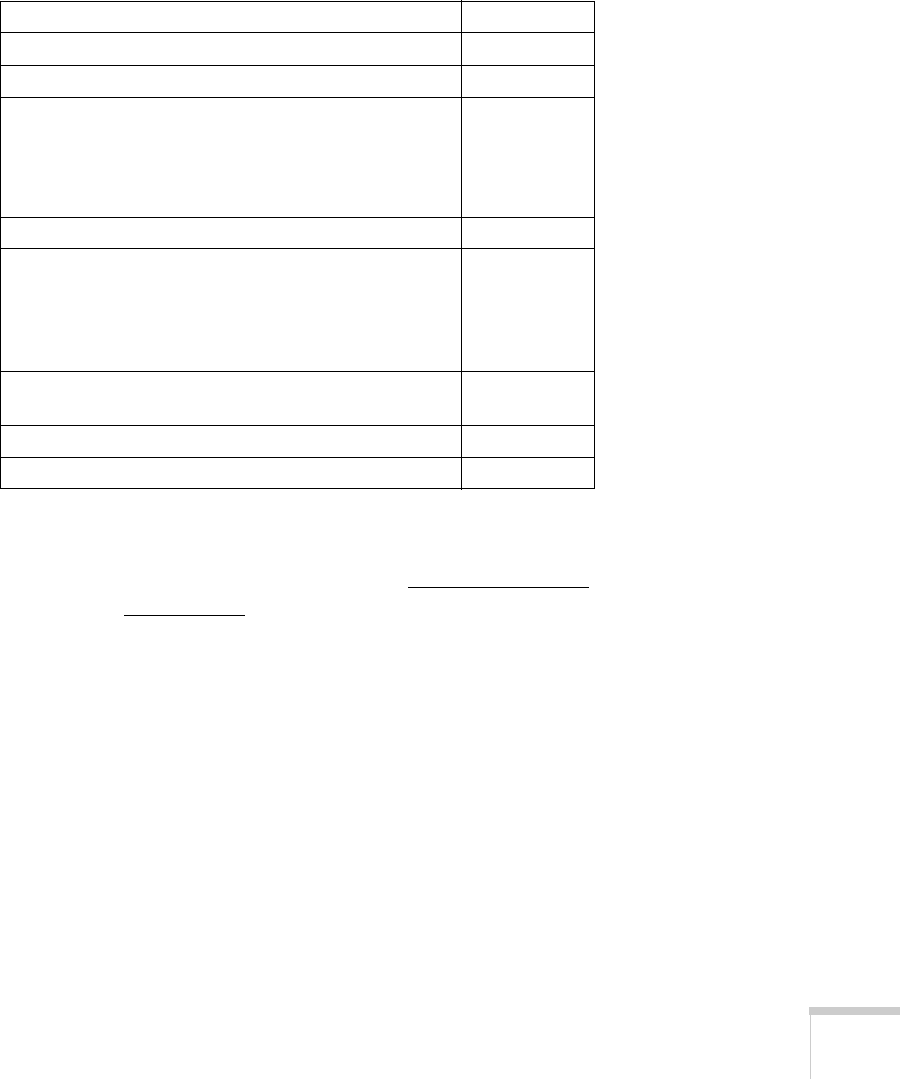
To enhance your use of the projector, Epson provides the following
optional accessories:
You can purchase screens or other accessories from an Epson
authorized reseller. To find the nearest reseller, call 800-GO-EPSON
(800-463-7766). Or you can purchase online at www.epsonstore.com
(U.S. sales) or www.epson.ca
(Canadian sales).
Product Part number
Replacement lamp V13H010L40
Air filter replacement set (2 filters) V13H134A08
Universal ceiling mount
False ceiling plate
Security bracket/cabling for gyro lock mounts
Adjustable ceiling channel
Suspension adapter
ELPMBUNI
ELPMBFCP
ELPMBSEC
ELPMBACC
ELPMBAPL
Kensington
®
security lock ELPSL01
50-inch portable screen (4:3 aspect ratio)
60-inch portable pop-up screen (4:3 aspect ratio)
80-inch portable pop-up screen (4:3 aspect ratio)
83.6-inch hanging pull-down screen (4:3 aspect ratio)
DUET Portable Projector Screen (4:3/16:9 combination)
ELPSC06
ELPSC07
ELPSC08
ELPSC09
ELPSC80
HD-15 to component video cable
S-video cable
ELPKC19
ELPSV01
Distribution amplifier ELPDA01
Image presentation camera (ELPDC05) V12H162020
User's Guide - 1810.book Page 11 Monday, September 10, 2007 6:39 PM


