Removing a Hard Disk Drive From the Internal
Drive Bay
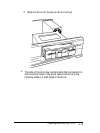
To remove a hard disk drive, reverse the installation steps
outlined above. Then disconnect the hard disk drive ribbon
cable and the power supply cable from the back of the drive.
When you disconnect the cables, grasp the connectors and pull
them straight out so you do not bend the pins; do not pull on
the cables. Use the screw to again secure the hard disk drive
mounting bracket to the base of the computer.
Installing a Drive in the Upper Horizontal Drive Bay
Your system comes with a 3.25-inch diskette drive installed in
the lower horizontal drive bay. You can also install a diskette
drive, a CD-ROM, a tape drive, or a second hard disk drive in
the upper horizontal drive bay. If you install a second hard disk
drive in this bay, make sure you purchase the appropriate cable
to connect both drives to the hard disk drive connector.
Before you install a drive in the upper drive bay, remove the
cover. Once you have the drive installed, replace the cover,
following the instructions in Chapter 3.
installing and Removing Dives
4-11


