


Installing the Software for Windows 3.1
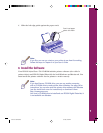
1. Make sure your printer is connected to the computer and your computer is
turned on.
2. Make sure Windows Program Manager is running. Exit any open applications.
3. Insert the EPSON Stylus Photo 700 CD-ROM or diskette 1 if you’re using
diskettes.
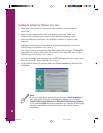
4. From the Program Manager File menu, select Run.
5. If you are installing from the CD-ROM, type D:\Setup700, click OK, and continue
with step 6. If you are installing from diskettes, type A:\SETUP, click OK, and
continue with step 7. (If your drive uses a different letter, substitute it for
D or A.)
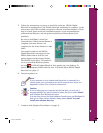
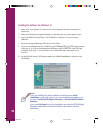
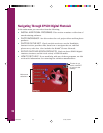
6. At the EPSON Setup CD Window, make sure Initial Installation is selected and
click Next.
Note:
If you are installing the printer software for the first time, Initial
Installation is your only option. If you are reinstalling the software, you
can select Install EPSON Digital PhotoLab or Reinstall EPSON Printer
Software.
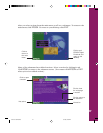
If you click Exit Setup during the installation, you skip the EPSON Digital
PhotoLab installation and proceed directly to the printer software
installation.
10
Comoro+ GS Booklet 3/17/98, 4:35 PM14