


25
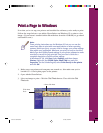
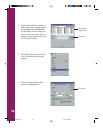
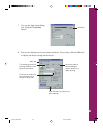
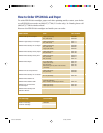
8. Click File again and select Print. You see the print dialog box.
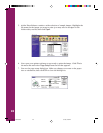
9. Check the following settings:
■
Make sure the Mode option is set to Automatic; the printer software
optimizes the other settings according to the media type and ink settings
you make. Or you can click the Advanced button and select one of the
predefined Custom Settings. See Chapter 2 in your User’s Guide for
details.
■
Move the Quality/Speed slider to the Quality setting. This changes the
print quality shown in the Current Settings box to Fine - 720 dpi. (The
slider is not available if you are using a custom setting.)
■
Make sure Media Type is set to Plain Paper. (If you load a different type
of paper, you’ll need to select a corresponding Media Type.)
10. Click Print to start printing. If you have background printing turned on, EPSON
Monitor3 opens in the background to monitor your print job. See Chapter 4 of
your User’s Guide for more details about Monitor3.
Soon you’ll see the amazing photographic detail your EPSON Stylus Photo 700
printer can produce.
Click Print after
you select your
settings
This setting gives good
printing results for most
types of documents
Click here to select the
type of media you’ve
loaded in the printer
Move the slider to choose
between higher resolution
or faster printing
Comoro+ GS Booklet 3/17/98, 4:36 PM29