


14
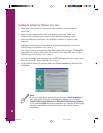
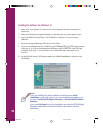
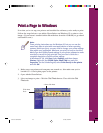
6. Click Install for the default installation (Easy Install) and follow the instructions
on screen to install the printer software and utilities.
After the printer software installation is complete, you must reboot your
Macintosh. Then you can continue with the EPSON Digital PhotoLab
installation.
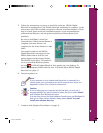
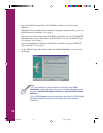
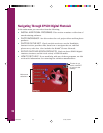
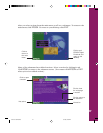
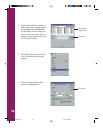
7. Double-click the EPSON Digital PhotoLab Install icon and follow the
instructions on screen to install it. An alias for EPSON Digital PhotoLab
appears on your desktop and EPSON Digital PhotoLab automatically launches.
To launch this program again later, double-click the alias. For details about the
program, see page 15.
8. Continue with “Selecting Your Printer” in the next section.
Selecting Your Printer
After you install the software, you need to select your printer using the Chooser.
Note:
If you are using a Quadra 950 or 900, you must choose Compatible in
the Control Panels, Serial Switch dialog box before selecting your printer
in the Chooser.
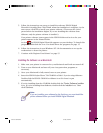
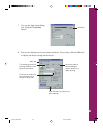
1. Open the Chooser from the Apple menu.
2. Click the SP 700 icon.
3. Click the icon for the port where you connected your printer.
4. Make sure AppleTalk is inactive if your printer is connected to the printer port.
Note:
You can activate AppleTalk only if AppleTalk or the Network Control
Panel is set to Ethernet or Remote Only.
5. Turn on background printing if you want to run print jobs and use your
Macintosh at the same time. (This may slow down printing and Macintosh
processing.)
6. Continue with “Register Your Printer” in the next section.
Comoro+ GS Booklet 3/17/98, 4:35 PM18