


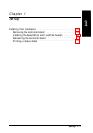
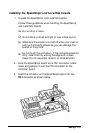
Installing Your Hardware
EpsonScript for the ActionLaser 1600 comes with two interface
boards: the EpsonScript board and the LocalTalk interface
board.
In a PC environment, you need to install the EpsonScript board
only. In a Macintosh environment, you need to install both the
EpsonScript and LocalTalk interface boards.
If your ActionLaser 1600 is already equipped with EpsonScript
and LocalTalk (if needed), you can skip this chapter.
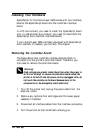
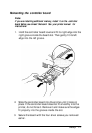
Removing the controller board
The EpsonScript and LocalTalk interface boards attach to
connectors on the printer’s controller board. Therefore, you
first need to remove the controller board.
Warning:
High voltages are present inside the printer when the power is
on. Do not attempt to remove the controller board unless the
printer is turned off and the power cord is unplugged. Also, do
not touch the contacts on the board because many of the
components
can
be damaged by static electricity.
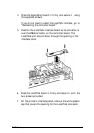
1.
Turn off the printer and unplug the power cable from the
electrical outlet.
2.
Remove any optional font cartridges and the lower paper
cassette, if installed.
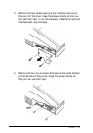
3.
Disconnect all interface cables from the interface connectors.
4.
Turn the printer so that its left side is facing you.
1-2 Setup