


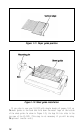
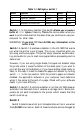

The installation procedure is the same for all three of the available
interface cards. The card is easily mounted or removed. The only tool
you need is a Phillips screwdriver.
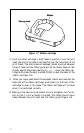
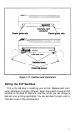
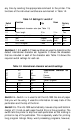
To install the interface card slide it into the cavity on the back of the
LQ-1500 as shown in Figure 1-17. It should slide between the upper
and lower plastic guide rails on either side of the opening.
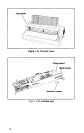
When you feel resistance on the right side of the card, firmly push it
in with both hands. It may help to push against the card release levers
to snap the card into place. The interface card should be flush and
even with the back of the printer; it should not tilt or protrude.
Now, lift up slightly on the card and secure it in place with the
screws provided.
If you use your LQ-1500 with different computers, you may have to
remove and replace this card. Begin by removing the retaining screws.
Then pull the release levers on both sides of the interface card at the
same time. The card will slide out easily.
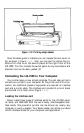
Attaching the cable to the printer
Note: Before you connect any cables, be sure that both the printer
and the computer are turned OFF.
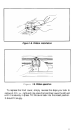
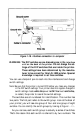
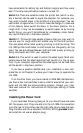
One end of your printer cable should plug right into the connector
on the interface card (if it doesn’t, you have the wrong cable). To
secure the connection, attach the two clips on the interface card to the
cable (parallel interface only) or tighten the two screws on the cable
connecter (serial and IEEE 488 interfaces). If your cable has a ground
strap, connect it to the screw just above the interface connector. Figure
1-18 shows both types of connections.
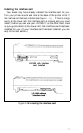
Connecting the printer cable
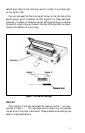
For many computers, you merely plug the cable into the printer
port on your computer. Some computers require a printer interface
card, either mounted inside the computer or externally. Check your
computer installation and operations manual for details on how to
connect your computer to a printer.
18