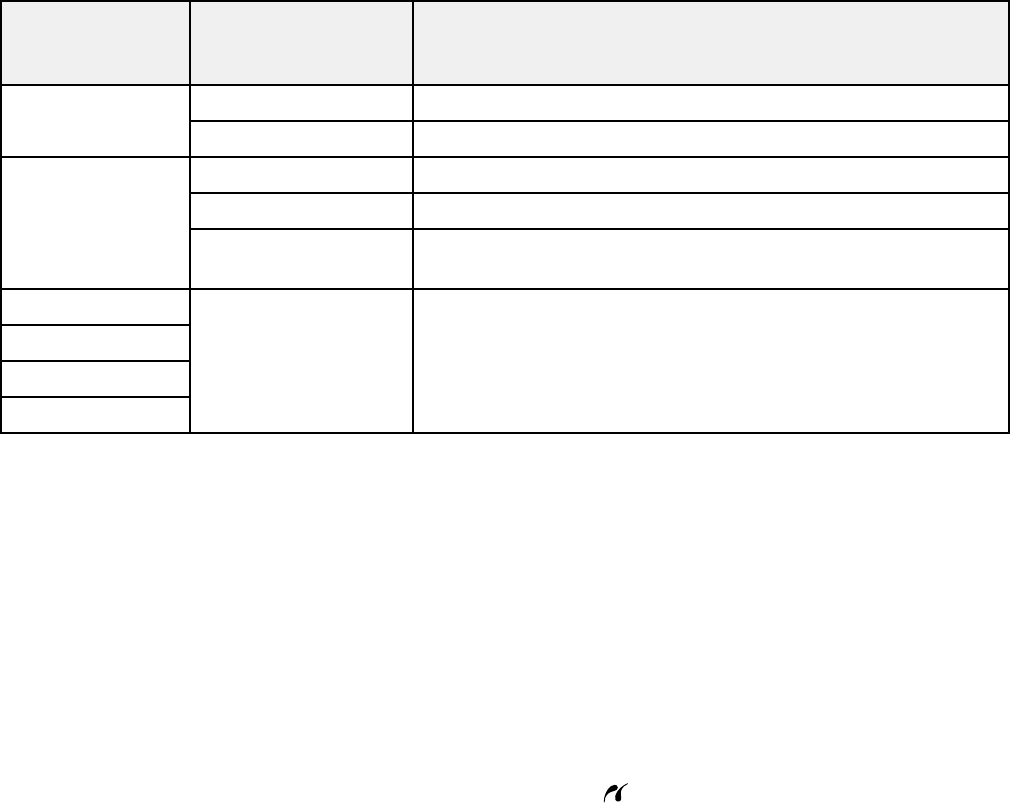
Photo Available options Description
Adjustments
settings
Fix Red-Eye Off Does not automatically fix the red-eye effect in photos
On Automatically fixes the red-eye effect in photos
Filter Off Turns off the filter setting
Sepia Applies a sepia tone filter to the viewed or printed photo
B&W Applies a black-and-white filter to the viewed or printed
photo
Brightness Various settings Adjust individual qualities in your photo
Contrast
Sharpness
Saturation
Note: Fix Photo uses a sophisticated face recognition technology to optimize photos that include faces.
For this to work, both eyes and the nose must be visible in the subject's face. If your photo includes a
face with an intentional color cast, such as a statue, you may want to turn off Fix Photo to retain the
special color effects.
Parent topic: Selecting Print and Photo Adjustment Settings
Connecting and Printing from a Camera
Before you connect your camera, make sure the product is turned on but not printing.
1. Remove any memory cards from the product.
2. Load the paper you want to use for printing.
3. Connect the USB cable that came with your camera to the USB port on the front of your product.
Note: You cannot use the USB port to transfer images from your camera to your computer.
4. Turn on your camera.
5. Follow the instructions that came with your camera to select and print your photos.
When you finish printing, turn off your camera and disconnect it from the product.
193
