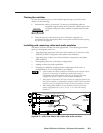
B-5Matrix 50 Series Switchers • Reference Information
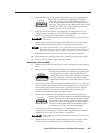
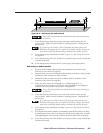
6. When all of the video (and audio) modules are mounted, reconnect the bus
ribbon cable to each board by aligning the holes in the
connector with the pins in the bus connector on each
board, and pressing evenly until the receptacle tabs lock
into place. Ensure that the bus ribbon cable is not twisted
and that the red line on the ribbon cable is toward the
center of the video and audio boards.
7. If the size of the video matrix was changed (8 x 4 configuration to 12 x 8
configuration, for example) or if video or audio capabilities were added or
removed, see Setting the front panel jumper, on page B-10.
Ensure that tools and hands are outside the switcher before powering up
the switcher.
8. Attach the power cord to the switcher and to the AC power source. Make
sure the switcher is working properly. Unplug the AC power cord.
If, on power-up, the switcher’s Power LED blinks four times, pauses, and
blinks four times again, there is a conflict in the jumper settings. Remove the
power cable, recheck the jumper settings, and power the switcher up again.
9. Reinstall the switcher’s top cover. See Closing the switcher on page B-3.
10. If the switcher was removed from a rack, reinstall the switcher in the rack.
11. Reconnect the AC power, input, and output cables.
Removing a video module
1. Follow the instructions in Opening the switcher on page B-2 to remove the top
cover.
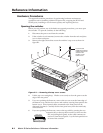
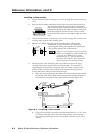
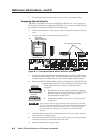
2. Remove the bus ribbon cable that connects any video and audio modules to
the front panel board by pressing the two receptacle tabs
on the top cable outward as shown at the left, and
pulling back gently on the cable connector to remove it
from the receptacle. Do this for each video or audio
board connection and move the ribbon cable out of the
way.
3. Using an Extron BNC extraction tool (part #100-096-01) or a 9/16”, deep well
socket with thin walls, remove all hex nuts securing the video module to be
removed to the rear panel of the switcher. Gently pull the video module
forward so the BNC connectors clear the holes in the rear panel of the
switcher. Lift the video module out of the switcher.
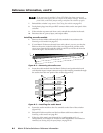
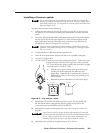
4. If there are no further module installations or removals to be performed,
reconnect the bus ribbon cable to each board by aligning the
holes in the connector with the pins in the bus connector
on each board, and pressing evenly until the receptacle
tabs lock into place. Ensure that the bus ribbon cable is
not twisted and that the red line on the ribbon cable is
toward the center of the video and audio boards.
5. If the size of the matrix was changed (8 x 4 configuration to 12 x 8
configuration, for example) or if video or audio capabilities were added or
removed, see Setting the front panel jumper, on page B-10.
Ensure that tools and hands are outside the switcher before powering up
the switcher.
6. Attach the power cord to the switcher and to the AC power source. Make
sure the switcher is working properly. Unplug the AC power cord.
Ribbon cable
Self-latching receptacle
Ribbon cable
Connector
Self-latching receptacle
Ribbon cable
Self-latching receptacle


