


Operating the System 5cr • Chapter 3
Extron • System 5
cr
Switcher • User’s Manual
Configuration Setup from the Front Panel
For the System 5 switcher to control other equipment in the A/V system, it
must be configured from the front panel, or through an RS-232 device.
This cannot be done from an IR 40 or SCP 100. See Chapter 4 for
Windows® Control program and Appendix A for RS-232 instructions.
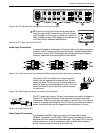
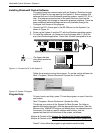
Infrared Programs and Libraries
Extron provides a library of drivers for most projectors. To download a
driver from the library, see the procedures located in Chapter 4. A typical
projector driver assigns projector IR commands to the System 5 panel
functions such that the Display Power, Mute and Mode functions can
control the projector. Also, once programmed, selecting PC1, PC2 or PC3
inputs can set the projector to RGB format, while VID1 and VID2 can set
the projector to either S-video or Composite Video. Selection can be from
the front panel or by remote. To configure the System 5 from the front
panel, use the following procedures.
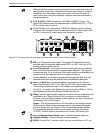
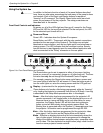
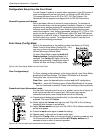
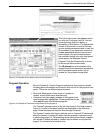
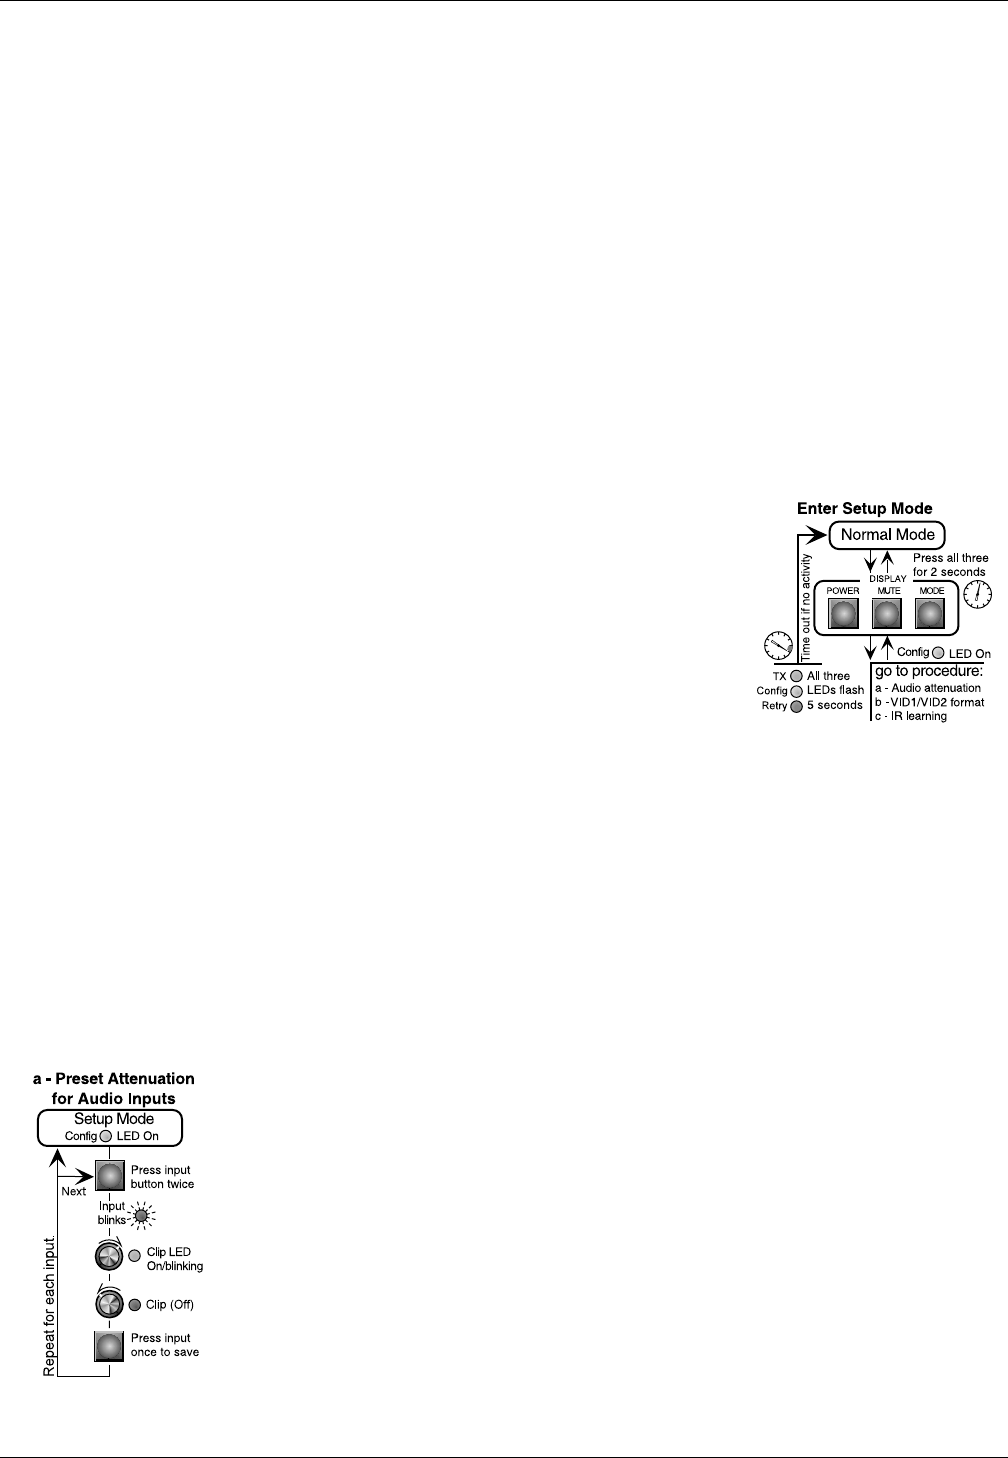
Enter Setup (Config) Mode
Each of the procedures in this section is done from Setup (or Config)
Mode. Once in Setup Mode (Config LED = On),
you may go from one procedure to another
without returning to Normal Mode.
To enter Setup Mode, press and hold all 3
Display buttons (Power/Mute/Mode) for 2
seconds. The Config LED lights. Go to the
appropriate procedure. Pressing the same 3
buttons will also exit Setup (Config) mode.
Figure 3-2a. Enter Setup Mode from the Front Panel.
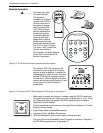
Clear Configuration(s)
To Clear existing configuration(s) to the factory default, from Setup Mode,
double-click the Room button. The Room LED blinks for 8 seconds.
During that time, do one of the following:
Clear One – press the desired button to clear only its IR configuration.
Clear ALL – press all 3 Display buttons (Power/Mute/Mode) at the same
time for 2 seconds to reset all IR and other settings to factory defaults.
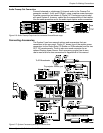
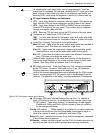
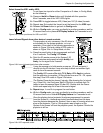
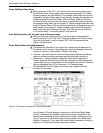
Preset Audio Input Attenuation Levels
For the Audio Volume control to act as a “master” control for all inputs, all
audio inputs must be set for same level. With audio input signals
connected and active, enter Setup Mode and do the following:
1a. Press the input button twice (double-click) for the audio input to be
adjusted. The input LED blinks.
2a. Slowly adjust the Volume knob up (cw) until Clip LED is On or blinking
frequently with changes in sound level.
3a. Adjust Volume down (ccw) just until Clip LED is Off or blinks occasionally
as the level peaks.
4a. Press the input button again to save the setting.
5a. Repeat steps 1a through 4a for each audio input.
6a. While still in Config mode, you may go directly to another procedure, wait
for 20 second time-out or press and hold all 3 Display buttons for 2
seconds to force a return to normal operation.
Figure 3-2b. Set the audio input attenuation to the same levels.
3-3