Setup Mode
USING SETUP MODE
User's Manual 5-9
Quick
Reference
Introduc-
tion
Setting Up
Paper
Handling
Printing
Setup Mode
Points to Remember
• Load continuous forms paper before entering setup mode. In setup
mode, the LF/FF button cannot be used to feed paper. To adjust the
line position of paper in setup mode, use the platen knob.
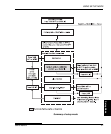
• Whenever you enter setup mode, short help menus are printed
at the top of the page. Help menus are also printed when you select
the SELF-TST, HEX-DUMP, or V-ALMNT functions. Use help
menus for quick reference while in setup mode.
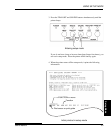
• When printing the items and options for each function, you can only
print one item at a time. However, you can move either forward or
backward in the item list. To move forward (print the next item), press
the MENU button. To move backward (print the previous item), press
the TEAR OFF button.
• While in the <<FUNCTION>> menu or when selecting a function that
contains items and selectable options, press the ONLINE button to
reprint the <<FUNCTION>> menu.
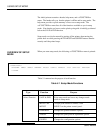
• A short underline under the first two letters of an option indicates that
it is the current default setting. For example,
12 CPI indicates that 12
characters per inch is the default pitch.
To change the default, select and save a new pitch setting.
• While in setup mode, you can use the LIST function to print out a list
of the currently selected options (see the next section for details).
• To exit setup mode and permanently save your changes, select either
the SAVE & END function. For details, see the section Exiting and
Saving later in this chapter. To exit setup mode without saving your
changes, turn the printer off. Your previous power-on defaults are
active when you turn the printer on again.


