fi-6140/fi-6240 Image Scanner Getting Started 10
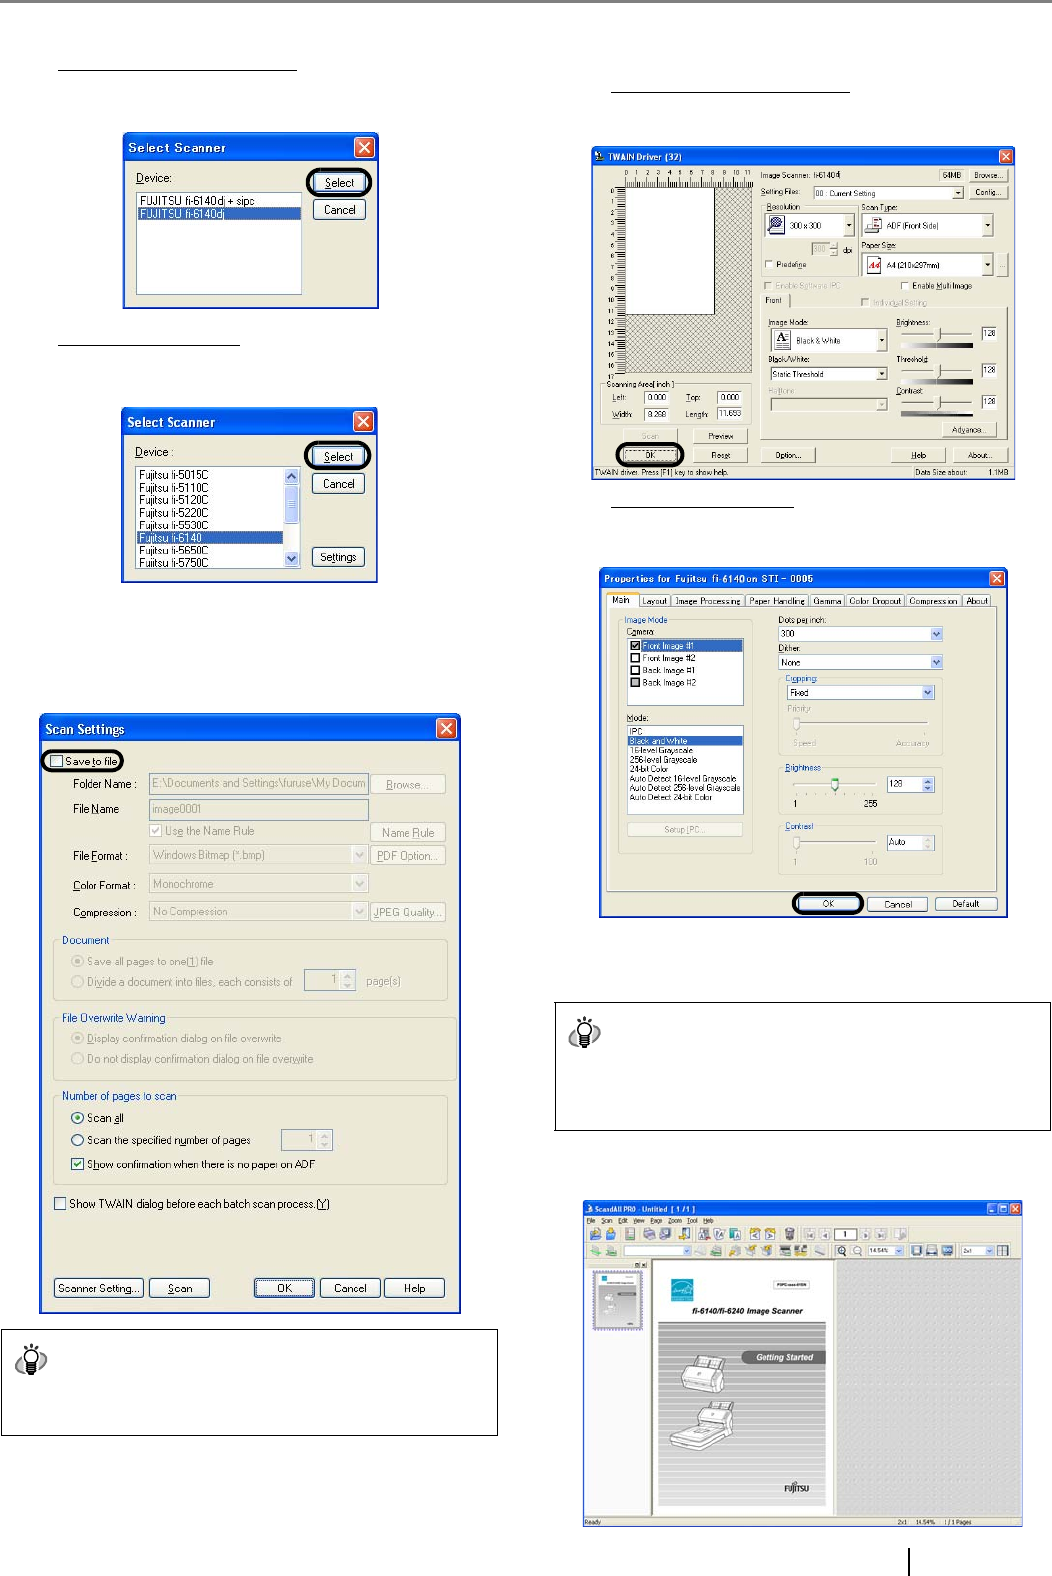
7. Select a scanner in the displayed dialog box.
To use FUJITSU TWAIN 32:
Select [FUJITSU fi-6140dj] or [FUJITSU fi-6240dj],
and then click the [Select] button.
To use FUJITSU ISIS:
Select [Fujitsu fi-6140] or [Fujitsu fi-6240dj] and then
click the [Select] button.
8. Select [Scan] on the menu, and then select [Scan
Settings].
9. In the [Scan Settings] dialog box, clear the [Save to
file] checkbox.
10. Click [Scanner Settings].
⇒ A setup dialog box appears for you to configure
scanner driver settings.
11. Configure scanner settings such as the resolution
and paper size.
To use FUJITSU TWAIN 32:
On the dialog box below, configure scan settings, and
then click the [OK] button.
To use FUJITSU ISIS:
On the dialog box below, configure scanning settings,
and then click the [OK] button.
⇒ You are returned to the [Scan Settings] dialog box.
12. Click the [Scan] button.
⇒ The document is scanned and the scanned image is
displayed in the [ScandAll PRO] window.
HINT
You only check the operation now, so you do not have to
save to file.
HINT
When you are using FUJITSU TWAIN 32, you may see the
TWAIN Driver setup dialog box again. If so, click the [Scan]
button on the dialog box.


