ScanSnap S510 Getting Started | 7
2. Connecting ScanSnap
This chapter describes how to connect ScanSnap to your
PC.
2.1. Installing the Supplied Software
Before connecting the scanner to your computer, please
install the following software on your PC.
① Adobe Acrobat (Application)
② ABBYY FineReader for ScanSnap (Application)
③ ScanSnap Manager (Driver)
④ ScanSnap Organizer (Application)
⑤ CardMinder (Application)
Each software is supported by the following OS:
Windows 2000
Windows XP
Windows Vista
*3
*2
-
*1
*1
*1
*4
*1
*1: Service Pack 1 or later
*2: Service Pack 2 or later
*3: Service Pack 4 or later
*4: The Search function is based on Adobe Acrobat functions.
To use the Search function in Windows Vista, install any
version supported by Windows Vista. Without a supported
version of Adobe Acrobat, the search function is not
guaranteed to work properly.
• Be sure to install "ScanSnap Manager" before
connecting the scanner to your PC.
If the scanner is connected before installing
ScanSnap Manager, the “Found New Hardware
Wizard” appears (This screen may differ
depending on the used OS). In this case, click the
[Cancel] button to close the wizard.
• When the ScanSnap is connected to a PC, It is
not possible to simultaneously connect other
models (ScanSnap fi-5110EOX series, ScanSnap
S500 or ScanSnap S300) or another S510 to the
same computer.
• If any driver of the ScanSnap fi-4110EOX series
has already been installed on your computer,
uninstall it before starting the installation.
• If the driver of ScanSnap fi-4010CU has already
been installed, it is not necessary to uninstall it.
You can connect ScanSnap fi-4010CU and S510
to a PC simultaneously.
• Log on as a user with “Administrator” privileges.
• ScanSnap S510 system requirements are:
Windows XP/2000
Windows Vista
CPU
: Intel
®
Pentium
®
4 Intel
®
Pentium
®
4
1.8GHz or higher 1.8GHz or higher
Memory:
256MB or more 512MB or more
(512MB or more when Excellent is used)
* If the CPU and the memory do not meet the
recommended requirements or the USB version
is 1.1, the scanning speed will slow down.
2.1.1. Installing Adobe Acrobat
Please prepare the Adobe Acrobat CD-ROM.
Install the same language version of Adobe Acrobat
as your Windows. Adobe does not guarantee the
use of Acrobat on a different language platform.
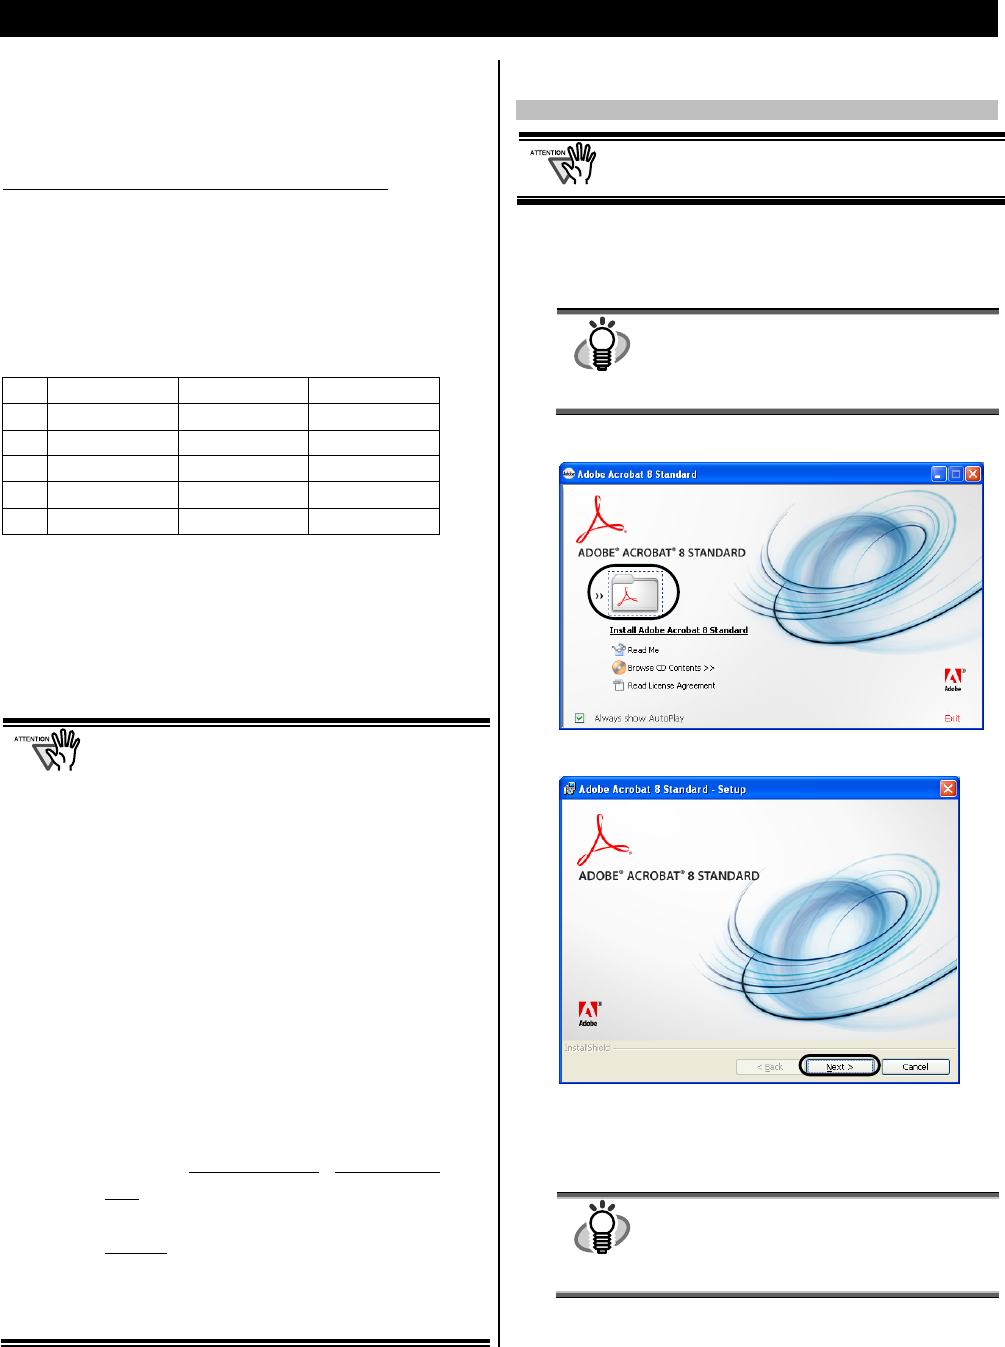
1. Insert the "Adobe Acrobat CD-ROM" into the CD
drive.
The "Adobe Acrobat" window appears.
HINT
This dialog box is not displayed automatically
when the "Auto play" setting of your computer is
deactivated. In this case, run “AutoPlay.exe” of
this CD-ROM directly using Windows Explorer
or My Computer.
2. Click on the folder icon.
3. Click the [Next] button.
Installation is started and the setup dialog box appears.
4. Follow the on-screen instructions to install the
software.
HINT
Select “How to install” on the “Adobe Acrobat”
dialog box to learn more about the Adobe
Acrobat installation.
Refer to “Adobe Acrobat Help” about how to
use Adobe Acrobat.


