


www.gateway.com
51
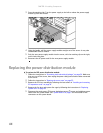
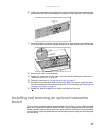
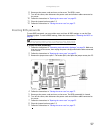
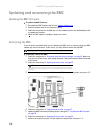
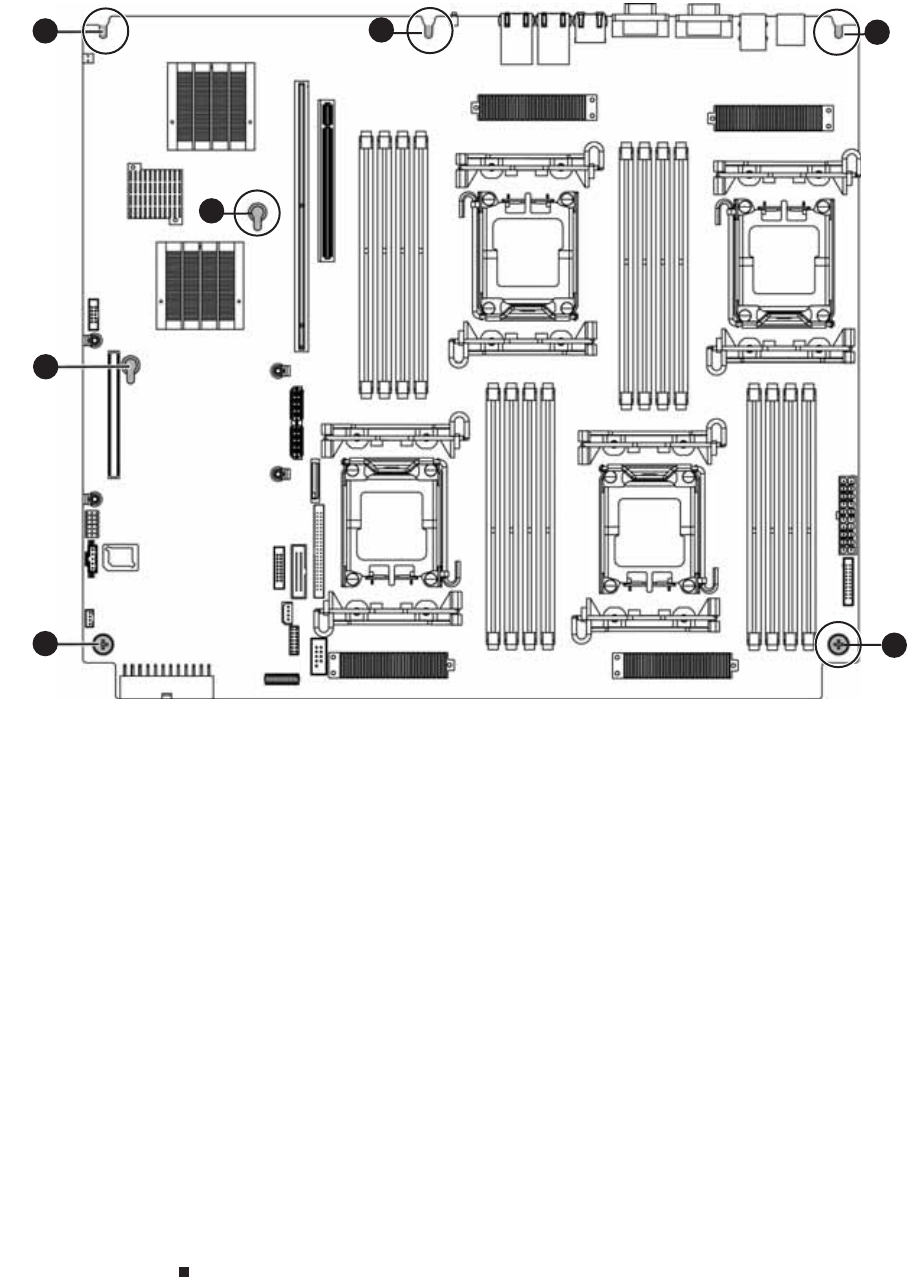
8 Loosen the two thumbscrews (1) that secure the system board to the server.
9 Slide the system board toward the back of the server until it is free of the five retaining
standoffs (2), then lift the board from the chassis.
10 Place the old system board in a static-free bag for storage.
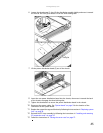
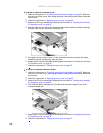
11 Insert the new system board into the chassis, aligned with the eight retaining standoffs,
then slide the board toward the front of the case so the board is held by the standoffs.
12 Tighten the two system board thumbscrews you loosened in Step 8.
13 Connect the cables you removed in Step 7
14 Replace the heatsink(s) and processor(s) Follow the instructions in “Replacing or adding a
processor” on page 41.
15 Replace the memory by following the instructions in “Installing memory” on page 31.
16 Replace the system fan cage and fan duct by following the instructions in “Replacing system
fans” on page 38.
17 Reinstall the PCI riser assembly by following the instructions in “Installing and removing
PCI expansion cards” on page 34.
18 Follow the instructions in “Closing the server case” on page 27.
19 Turn on your server, then press F2 when the Gateway logo screen appears during startup.
The BIOS Setup utility opens.
20 Check BIOS settings to make sure that they detect the server’s new hardware, then save
your changes (if any) and close the BIOS Setup utility.
21 If your server does not start after installing the new system board, contact Gateway
Customer Care. For more information, see “Getting Help” on page 9.
2
2
2
2
1
2
1