6-4
Trouble-Shooting
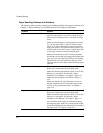
Paper Handling Problems and Solutions
The following table describes common paper handling problems and suggests solutions. See
Chapter 2, “Paper Handling,” for detailed procedures on loading and using paper.
Problem Solution
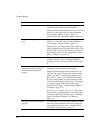
Paper cannot be loaded or fed. Make sure that the paper select lever located on the
top left of the printer is set correctly. Move the lever
backward for continuous forms or forward for single
sheets.
Make sure that the paper covers the paper-out sensor,
(i.e., the left paper edge is within 52 mm for single
sheets or 41 mm for continuous forms from the left
edge of the platen.) This problem cannot occur if you
use the forms tractor unit or insert a single sheet with
its left edge in contact with the left paper guide.
Make sure that the tractor unit is correctly installed
and that the tractor shaft gear engages the platen shaft
gear. If you are using the tractor unit for rear feeding,
open the front cover and make sure that the second
stud from the left on the printer bottom frame projects
outward.
Paper jams while loading. Turn off the printer and remove the jammed paper.
Remove any obstructions from the paper path.
Make sure that the paper thickness lever is set for the
thickness of your paper. See the table, “Paper
Thickness Lever Settings,” in Chapter 2, page 2-11.
Make sure that the paper is not folded, creased, or
torn.
Make sure that the left and right tractors are set so
that the continuous forms are stretched taut. See the
section, “Using Continuous Forms,” in Chapter 2,
page 2-14.
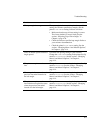
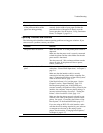
Paper jams while printing. Turn off the printer and remove the jammed paper.
Remove any obstructions from the paper path.
Make sure that the paper thickness lever is set for the
thickness of your paper. See the table, “Paper
Thickness Lever Settings,” in Chapter 2, page 2-11.
For continuous forms, make sure that the incoming
and outgoing paper stacks are correctly placed. Paper
should feed straight. See the subsection, “Positioning
the Paper Stack,” in Chapter 2, page 2-15.


