upgrading and servicing the pc
15
Filename: ma1rwtc.doc Title: HP-Print2k.dot
Template: HP-Print2K.dot Author: WASSER, Inc. Last Saved By: WASSER, Inc.
Revision #: 161 Page: 15 of 46 Printed: 04/26/01 09:20 AM
English
Adding and Removing
Drives
You can install a second hard drive into the
system or replace the existing hard drive. In
addition, you can replace the existing diskette or
optical drives.
Installing a Second Hard Drive
The HP Pavilion has an empty 3.5-inch drive bay
to accommodate an additional hard drive.
1
Turn off the computer and all peripherals.
2
Disconnect the modem/phone cable.
3
Disconnect the power cord and all other
attached cables (such as the keyboard, mouse,
and monitor).
4
Remove the side panel (see “Removing the
Side Panel” on page 4).
5
Remove the drive cage (see “Removing the
Drive Cage” on page 6).
Note:
Make sure the jumper on the new drive is in the
CS (Cable Select) position.
6
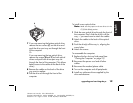
Slide the new drive into the empty bay in the
drive cage, until the screw holes align.
7
Install the two screws on the top of the drive
cage and the one screw on the bottom of the
drive cage.
8
Replace the drive cage (see “Replacing the
Drive Cage” on page 21).
9
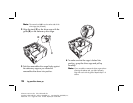
Attach the power cable to the back of the
drive.
10
Attach the connector marked “Master” on the
IDE ribbon cable to the back of the primary
hard drive. After this primary connection is
attached, twist the remaining part of the cable
marked “Slave” on that same IDE ribbon cable
and connect it to the secondary hard drive.
11
Connect the IDE cable to the motherboard.


