


Combined Boot User Manual Page 23
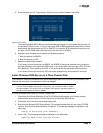
Making a Bootable System Disk
The examples in this procedure use the logical drive designated as "c1t1d0" (controller 1, target 1, lun
0). Your logical drive may be different.
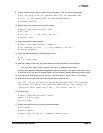
1. Boot from the local system disk.
2. Run the format utility.
# format
3. Select the logical drive to become the boot disk (in this case, c1t1d0).
4. Select the partition option and partition the disk as desired.
5. Select the label option and write a volume label to the target disk.
For help with the format utility, refer to the man page "man format".
6. Install the boot on partition 0 of the target disk. (Enter this command as one line.)
# installboot /usr/platform/ `uname -i`/lib/fs/ufs/bootblk /dev/
rdsk/c1t1d0s0
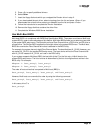
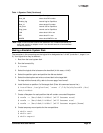
7. Create a filesystem for each partition that will contain a mounted filesystem.
# newfs -v /dev/rdsk/c1t1d0s0 (will become root)
# newfs -v /dev/rdsk/c1t1d0s6 (will become usr)
# newfs -v /dev/rdsk/c1t1d0s7 (will become export/home)
8. Create temporary mount points for the new partitions.
# mkdir root2
# mkdir usr2
# mkdir export2
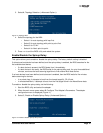
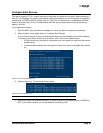
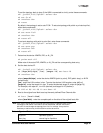
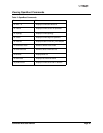
Host_did shows host DID number
Enable_flag internal flag for OpenBoot
Boot_id shows target ID number
Lnk_timer internal use for OpenBoot
Plogi_timer internal use for OpenBoot
LUN shows boot LUN in use
DID shows boot ID in use
WWPN shows boot WWPN in use
Note: Target ID can be bound to either DID (destination ID) or WWPN (worldwide port
name) and saved in an adapter nvram. It can also be saved in an environmental
variable boot-device.
Table 1: Signature Table (Continued)
Signature OpenBoot signature