


Step 1: Install the PCI Co-Processor Adapter in the
System Unit
Use the following steps as general information for installing your PCI
co-processor adapter. For specific adapter installation instructions,
consult the operating manual or the installation and setup manual for
your specific personal computer system.
1. Set all power switches to Off.
2. Unplug the power cords from the wall outlets.
3. Remove the cable-retaining brackets from the rear of the system
unit and display.
4. Disconnect all cables from the rear of the system unit.
5. Use a flat-blade screwdriver or 1/4-inch nutdriver to remove the
cover mounting screws (if present) from the system unit.
6. Remove the system-unit cover.
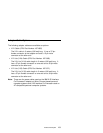
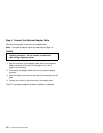
7. Locate an available PCI expansion slot in your system unit.
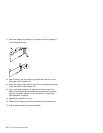
8. Use a flat-blade screwdriver or a 3/16-inch nutdriver to remove
the screw that holds the expansion-slot cover in place (see the
next page). Lift the expansion-slot cover from the system unit.
9. Hold the PCI co-processor adapter (still wrapped in the anti-static
bag) in one hand and touch a metal part of your system unit with
the other hand. This places your body, the adapter, and the
system unit at the same ground potential, thus preventing an
accidental static discharge.
10. Carefully remove the adapter from the anti-static bag. Be sure to
grasp circuit boards by the edges only; do not touch the
component pins or solder joints.
Installation 2-3