


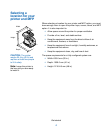
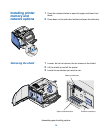

Installing
additional 500-
sheet drawers
Installing 250-
sheet drawers
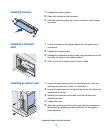
Drawer bottom
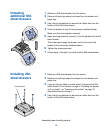
1
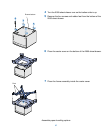
Remove a 500-sheet drawer from the carton.
2
Remove all packing material and tape from the drawer and
paper tray.
3
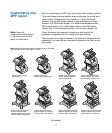
Use a flat tip screwdriver to remove the rubber feet from the
bottom of the 500-sheet drawer.
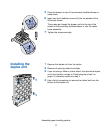
4
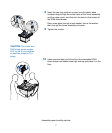
Place the drawer on top of the previously installed drawer.
Make sure they lock together securely.
5
Insert two long stabilizer screws (1) into the pockets of the 500-
sheet drawer.
The screws go through the drawer and into the top of the
screws of the previously installed drawer.
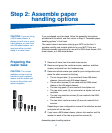
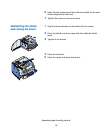
6
Tighten the screws securely.
7
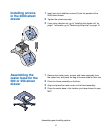
Follow steps 1 through 6 to install another 500-sheet drawer.
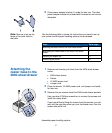
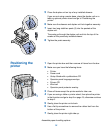
1
Remove a 250-sheet drawer from the carton.
2
Remove all packing material and tape from the drawer and
paper tray.
3
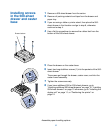
If you are using a table or printer stand, then place the 250-
sheet drawer in that location and go to “Installing the duplex
unit” on page 11 or “Positioning the printer” on page 12,
otherwise continue to step 4.
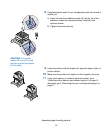
4
Use a flat tip screwdriver to remove the rubber feet from the
bottom of the 250-sheet drawer.
Assemble paper handling options
10