


Chapter 3. Installing and setting up call.connect 27
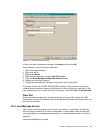
2. To start the console for the specified machine in the default environment, enter the
command:
adminclient <iSeries> <Port Number>
This may be quite slow. If an instance other than the default instance is required, enter the
port number. Otherwise, you may leave this blank.
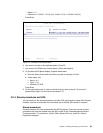
3. Wait for the message “Console Ready” to appear in the console. The topology view
appears by default.
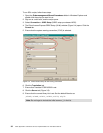
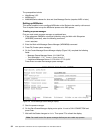
4. Open the node, application server, and container to display the beans. Click the
Application Server. Click Start and wait. The beans turn blue as they start. This may take
several minutes.
3.2.3 Journaling
Because WebSphere applications run under commitment control, files used by call.connect
must be journaled. There are many options to provide different levels of security.
Since files from different libraries must be journaled, the journal receiver and the journal must
be created in a new library rather than an existing System21 library. The following files must
be journaled to operate call.connect:
All physical files in library OSLOMF3
The following files in library OSLD1F3:
– INP40
– INP60
– OEP05
– OEP40
– OEP41
– OEP45
– OEP45E
– OEP55
– OEP56
However, merely journaling these files does not give the user the full advantages of journaling
such as extra security.
Performance improves if files are journaled to an auxiliary storage pool (ASP). You can use
the commands in the following sections with or without an ASP.
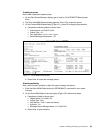
Journaling the files without an ASP
To journal these files without an ASP, complete the following steps. These are sample
commands only and may be varied as required.
1. Sign on as QSECOFR.
2. Create a new library for the journal receiver and journal, for example, OSLF3:
CRTLIB LIB(OSLF3) TEXT('OSL journal library')
3. Create a journal receiver:
CRTJRNRCV JRNRCV(OSLF3/OSL0001) THRESHOLD(50000) TEXT('System21 journal receiver.')
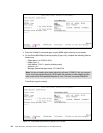
4. Create a journal:
CRTJRN JRN(OSLF3/OSL) JRNRCV(OSLF3/OSL0001) MNGRCV(*SYSTEM) DLTRCV(*YES) TEXT('System21
journal')