29
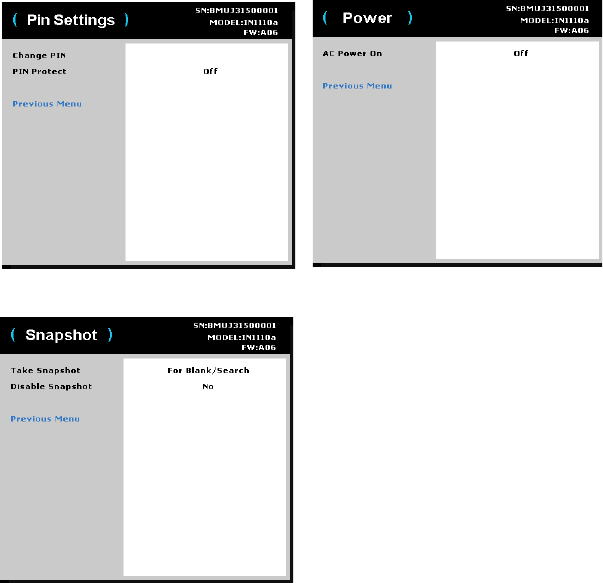
Pin Settings:
• Change PIN:
To enter the PIN at projector startup:
Power up the projector. The "Enter PIN" dialog box appear
s after the startup screen.
Enter the PIN. Use the navigation buttons on the remote or keypad to enter the
correct button press sequence. See the description above for instructions.
To change the PIN:
Select "Change PIN..." in the Setup menu. Enter the existing PIN. Enter the new
PIN. You can navigate between OK and Cancel by pressing the left and right arrow
keys. Press the Select button (or up/down arrow keys) to select the highlighted
option. Verify the new PIN.
If you lose or forget your custom PIN:
Contact InFocus support. Go to www.infocus.com/support
• PI
N Protect: the PIN (personal identification number) feature allows you to
password protect your projector. Once you enable the PIN feature, you must
enter the PIN before you can project an image. The default PIN on this
projector is Menu-Up-Down-Select-Source. Use the navigation buttons on the
remote or keypad to enter the correct 5-button press sequence. When all 5
numbers are entered correctly, press the Select button on the remote or keypad
to select OK. If the message "Wrong PIN" appears, verify the code and re-
enter it. If you mis-enter a number, you must enter 5 numbers and press the
Select button in order to access the "Wrong PIN" message and re-enter the
code.
Power:
• AC Power On: whe
n this feature is on, the projector automatically turns on
when electrical power is connected.
Snapshot:
• Take Snapshot: captures the current image and allows it to be used as the
search screen image. Note: Input resolution should be WXGA (1280x800) or
less with a 3MB maximum image size.
• Disable Snap
shot: removes the Snapshot function from the menu. A Factory
Reset is needed to add the Snapshot function back to the menu.
Advanced > Setup > Pin Settings menu
Advanced > Setup > Power menu
Advanced > Setup > Snapshot menu
