


35
PICTURE PROCESSOR FUNCTION (Manual Adjustment)
You can perform manual picture processing on an
image. There are 7 levels for each of the following
items: TINT (CYAN/RED, YELLOW/BLUE),
CONTRAST (LOW/HIGH) and BRIGHTNESS (LOW/
HIGH).
Preparation
●See page 12.
●Press INPUT SELECT to select the appropriate input mode
depending on the connection to the source unit (੬ page 18).
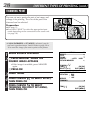
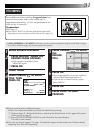
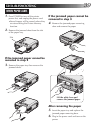
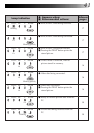
1
BEGIN SOURCE PLAYBACK
2
1
PRESS MEMORY WHEN THE
DESIRED IMAGE APPEARS
•If the image is unstable, press
MEMORY again.
2
PRESS OK
3
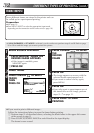
PRESS PICTURE PROCESSOR
UNTIL THE MANUAL SCREEN
APPEARS
•Pressing the PICTURE PROCESSOR
button changes the mode as follows:
•If you want to restore the original image
during adjustment, simply press MENU.
•If IrDA (INFRARED) or PC MODE is selected, you do not have to perform steps
1
and
2
. Refer to page
20 or 38 to send the image you want to print to the printer.
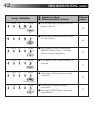
4
PRESS CURSOR TO SELECT
THE ITEM YOU WANT TO
ADJUST
5
PRESS CURSOR TO
ADJUST
•If you want
to exit the
MANUAL
screen, press
PICTURE
PROCES-
SOR.
6
REPEAT STEPS
4
AND
5
UNTIL
THE IMAGE APPEARS AS
DESIRED
7
PRESS OK
•The processed image appears on screen.
8
PRESS PRINT TO START
PRINTING
● If you press PICTURE PROCESSOR when
no image is stored in the printer, NO
STORED IMAGE appears on screen.
Store an image in the printer first, then
press PICTURE PROCESSOR again.
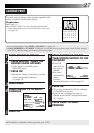
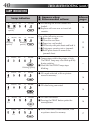
MANUAL
TINT CYAN RED
YELLOW BLUE
CONTRAST LOW HIGH
BRIGHTNESS
LOW HIGH
QUIT [PICTURE PROCESSOR]
ITEM
[
/
]
OK [OK]
ADJUST
[
/
]
MANUAL
TINT CYAN RED
YELLOW BLUE
CONTRAST LOW HIGH
BRIGHTNESS
LOW HIGH
QUIT [PICTURE PROCESSOR]
ITEM
[
/
]
OK [OK]
ADJUST
[
/
]
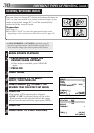
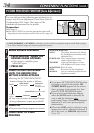
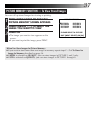
AUTO
PURE BLACK
(clear black)
TWILIGHT
(back-lit
compensation)
MONOTONE (black & white)
SEPIAMANUAL
original
image