


13
ENGLISH
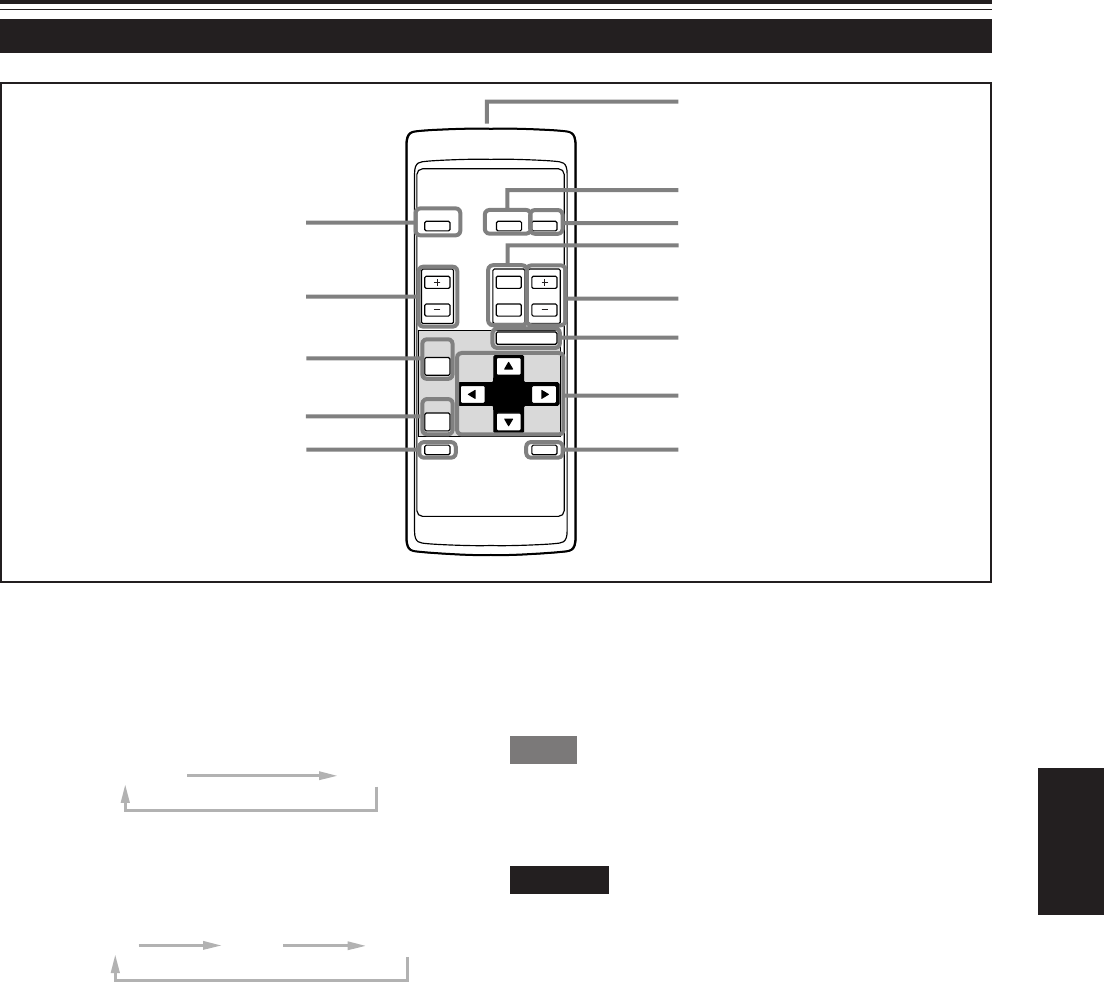
OPERATE
VOL.
PAGE
BACK
PRESET
ZOOM FOCUS
COMPUTER VIDEO
QUICK
ALIGN.
AV
MUTING
W
T
MENU/ENTER
1
2
3
4
5
6
7
8
e
w
q
p
9
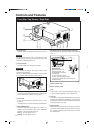
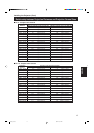
Controls and Features (Cont.)
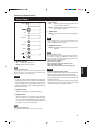
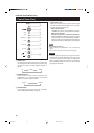
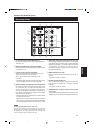
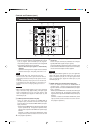
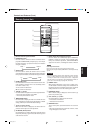
Remote Control Unit
1
Remote control’s signal transmitter
2
COMPUTER button
Use this button to select the devices connected to the
projector’s COMPUTER IN (computer input) -1 and -2 input
terminals. Each time you press the button, the selection
changes as follows:
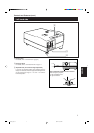
9
QUICK ALIGN. (Quick Alignment) button
Use this button to automatically adjust TRACKING,
PHASE, H. POS. and V. POS. of the projected video.
During the automatic adjustment, QUICK-ALIGNMENT
appears on the screen, and disappears after it is finished.
Memo
Quick alignment function:
Does not work for video input (AV IN input terminal) signals.
Works only for computer-related (COMPUTER-1 and-2 input terminals)
signals.
CAUTION
• Automatic adjustment with the quick alignment function should be
done on a bright still-picture screen. This function may not work
correctly on a dark screen or motion-picture screen. If adjustment
with this function is not satisfactory, adjust TRACKING, PHASE, H.
POS. and V. POS. manually (see pages 32, 38 and 39).
p
PRESET button
While making adjustment on the main or setting menu,
use this button to reset the setting of the selected item to
the factory-set value. This button works only for numerical
settings and does not work for switching ON to OFF.
q
PAGE BACK button
While a details setting is displayed, use this button to go
back to the previous page.
w
VOL. (Volume) (+/–) button
Use these buttons to adjust the sound volume:
+: Increase the volume level.
–: Decrease the volume level.
e
OPERATE button
To turn on the power, press this button for one second or
more.
* About 30 seconds after the power has turned on, video
image will appear on the screen.
COMP 1
COMP 2
Y/C
VIDEO
YPBPR
3
VIDEO button
Use this button to select the devices such as a video
connected to the projector’s AV IN (AV input) terminal. Each
time you press the button, the selection changes as follows:
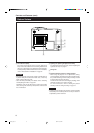
4
ZOOM (T/W) button
Use these buttons to increase or decrease the screen size.
(The projector’s projection lens is an electrically driven
zoom lens of about 1.5 x.)
T:The screen size decreases.
W:The screen size increases.
5
FOCUS (+/–) button
Use these buttons to adjust the focus of the projected video.
+: The focus point becomes more distant.
–: The focus point becomes nearer.
6
MENU/ENTER button
Use this button to display the main menu. While the main
menu is displayed, pressing this button displays a details
setting (submenu) for items with details settings.
7
Cursor (5/∞/2/3) button
While the main menu is displayed, use these buttons to
select an item to adjust or make adjustment.
8
AV MUTING (On/Off) button
Use this button to turn off the video image and audio sound
temporarily. Pressing it again makes the video image and
audio sound to resume.
G20U p.05-14 99.12.17, 9:16 AM13