14
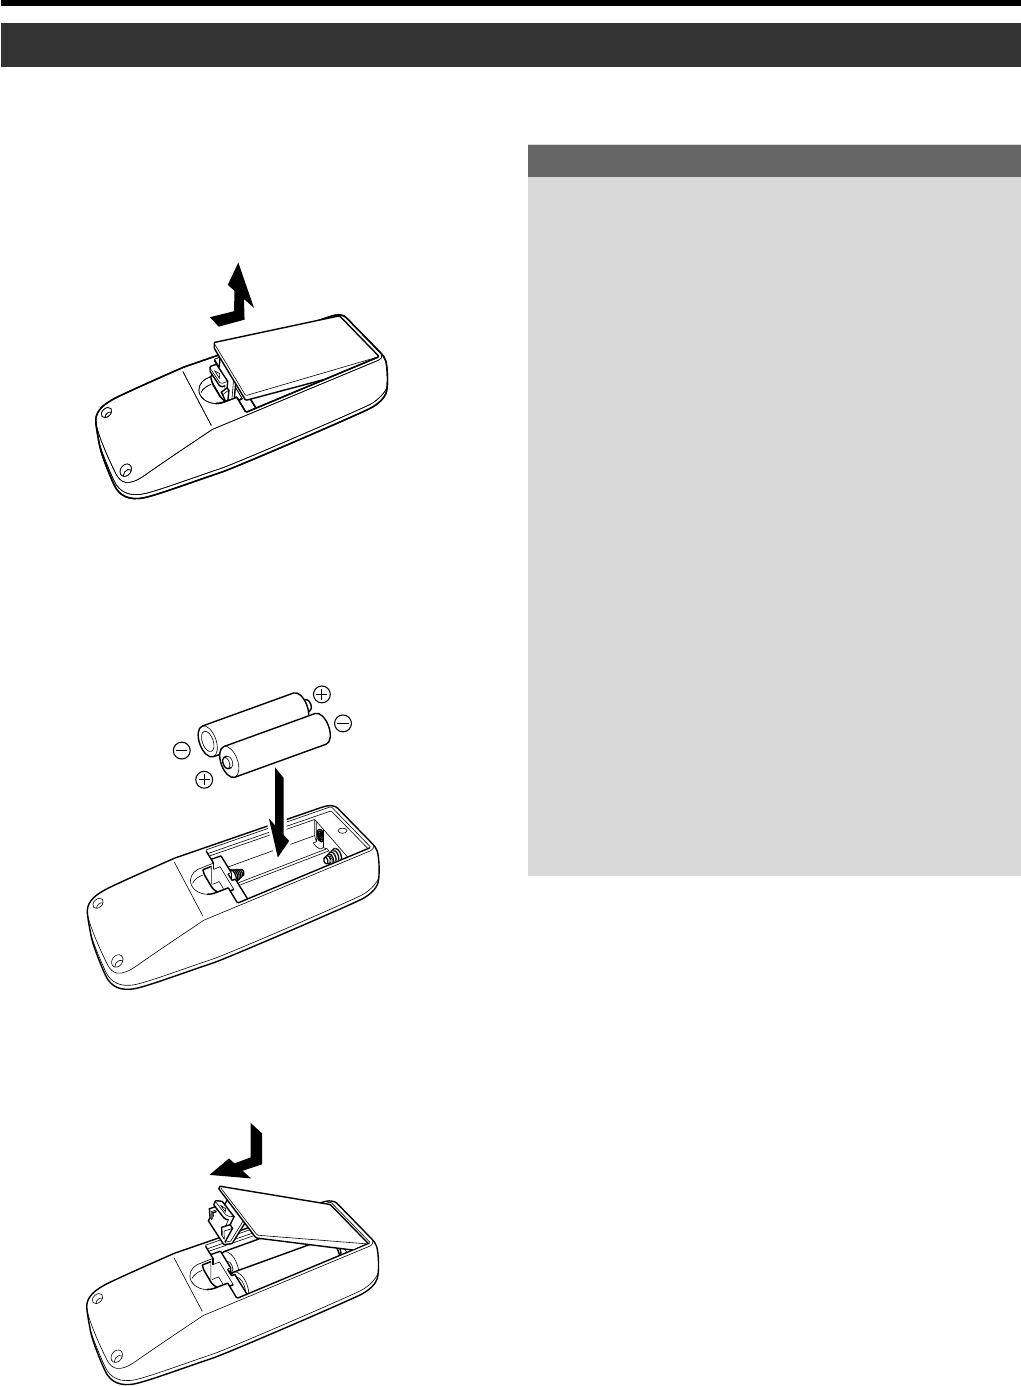
Loading Batteries into the Remote Control
Please load batteries into the remote control. If the remote control starts to work erratically, replace the batteries.
Controls and Features
1.
Open the back cover
• Push the hook on the back cover lightly in the direc-
tion of the arrow and lift it up.
2.
Load the batteries
• Place the two supplied batteries (AA/R6-size) into
the remote control as illustrated below. To prevent
short circuit, be sure to insert the minus · end of
the battery first.
3.
Close the back cover
• Close the back cover by inserting the end first and
pressing down until a click is heard.
Precautions for using batteries
If batteries are used incorrectly, they may crack or leak. This
could cause fire, burn, malfunction, staining or damaging of
the surroundings.
Beware of the following:
• Do not mix new and old batteries.
• Do not mix different types of batteries as they are differ-
ent in characteristics.
• Place batteries so they match the polarities indicated on
the cartridge.
• Be sure to insert the minus · end in first to avoid short-
circuiting.
• Do not put batteries into a fire or try to recharge them.
• Use only designated batteries.
• Remove the batteries if the remote control is not to be
used for a prolonged period.
Battery Life
Batteries run for six months to one year in normal use. How-
ever, the batteries supplied are for confirming operation and
may not run that long. When the remote control starts failing
to work properly, replace the batteries with new ones.
Battery Leakage
When the batteries are totally exhausted and can no longer
be used, replace them immediately.
Leaving the batteries in the battery compartment causes
battery leakage which in turn causes malfunction.
Further, in cases where the leakage comes to contact with
the skin, wipe it away with a cloth, otherwise skin problems
may occur.
HX-1E_p05-14_En.p65 10/3/03, 6:07 PM14


