


B-8 A-61662 October 2011
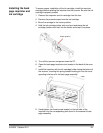
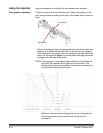
Cleaning the ink cartridge
print head
If the print head of the ink cartridge is dirty or the ink cartridge has not
been used for a long period of time, it may not print properly.
To clean the print head using the scanner, press the corresponding
Custom Function button (F1 or F2) on the control panel.
NOTE: You must assign the Clean Print Head function to one of the
Custom Function buttons (F1 or F2) using the Ngenuity
Operator Utility to be able to clean the print head using the
scanner. See the section entitled, “Settings button: Custom
functions” in Chapter 4.
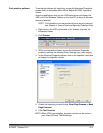
1. In the NOU, go to the Settings screen, select Clean Print Head for
either F1 or F2 key assignment, and save to the scanner.
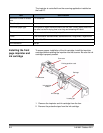
2. On the scanner, make sure print head(s) are positioned properly to
print at a desired print location.
3. Load one or more sheets of blank scrap paper that are wide enough
to pass under the current print head locations, and are at least 5
inches long.
4. Lower the skimmer and to allow the paper to load.
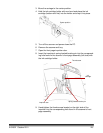
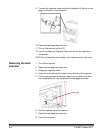
5. Press either the F1 or F2 (as assigned) key. A single sheet will be
fed and the print head cleaning pattern (a solid black stripe firing all
print head pins) will be printed on the page by each imprinter that is
installed.
6. Take the sheet from the exit tray and examine the printing. There
should be a relatively solid black stripe approximately 1.5 inches
long, with no voids or stripes. Voids or blank stripes indicate one or
more clogged ink jet nozzles.
7. Press either the F1 or F2 (as assigned) key to feed additional pages
until the printed black stripe is uniform and solid. This may take
several sheets.
8. If, after 6 to8 sheets, you cannot achieve a solid black stripe then
the print head should be removed from the imprinter and cleaned
manually. See the next section, “Additional print head cleaning” for a
more in-depth cleaning procedure.
9. Restore any previously set F key function via the NOU (if
necessary).