


Printer Conversion to KODAK EKTACOLOR Edge 8 and EKTACOLOR ROYAL VIII Papers • CIS-201 7
If the Under and Over test prints do not match the reference
prints, proceed as follows:
1. Use the method described in Step 4, above, to calculate
a correction to make the Under and Over test prints
match the Under and Over reference prints.
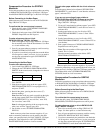
2. Input the Under correction into the Channel Under Shift
in the following way:
While pressing MODE, press SETUP. Then press NO
until CH UNDER SHIFT appears. Determine which
channels use this paper. Do not include channel 00 in
this correction. Place the Under negative into the
negative mask, press D-IN, and enter the correction
required for the Under slope. To input the sample
correction from above for channels 10, 11, 12, 13, 14,
and 15, enter:
(If the Under negative is not in the negative mask, an
NG error will occur and the correction will not be
made.)
3. Press the YES key. The Channel Under Balance
correction will be made to channels 10, 11, 12, 13, 14,
and 15.
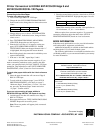
4. Input the Over correction into the Channel Over Shift in
the following way:
While pressing MODE, press SETUP. Then press NO
until CH OVER SHIFT appears. Determine which
channels use this paper. Do not include channel 00 in
this correction. Place the Over negative into the
negative mask, press D-IN, and enter the correction
required for the Over slope. To input the sample
correction from above for channels 10, 11, 12, 13, 14,
and 15, enter:
(If the Over negative is not in the negative mask, an NG
error will occur and the correction will not be made.)
5. Press the YES key. The Channel Over Balance
correction will be made to channels 10, 11, 12, 13, 14,
and 15.
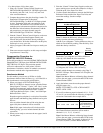
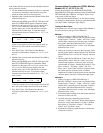
10-15 (U) Y/N
0.0 Y -.7 M -1.5 C -.4 D
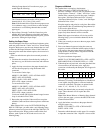
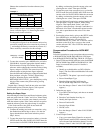
10-15 (O) Y/N
0.0 Y -.7 M -1.5 C -.4 D
Compensation Procedure for COPAL Minilab,
Models 1B, 1C, 5C, 5C II, 5L, 5S
Follow this procedure to test KODAK EKTACOLOR
Edge 8/ROYAL VIII Papers when converting from KODAK
EKTACOLOR Edge 7/ROYAL VII Papers, and to set up
your printer for the new papers.
Ensure that the Master Balance is on aim before making
any changes to printer balance. Back up current channel data
(see Step 5 under “Setting the Paper Slope”).
Testing the New Paper
If the printer uses only one type of paper, follow Method 1.
If it uses more than one type, follow Method 2.
Method 1:
1. When your supply of EKTACOLOR Edge 7/
ROYAL VII Paper is about to run out, print the Printer
Setup Negative “Normal,” “Under,” and “Over” on the
channel most commonly used for the paper. Label the
three prints “Old-Paper Reference Print—Normal,”
“Old-Paper Reference Print—Under,” and “Old-Paper
Reference Print—Over.”
2. When you are ready to convert to the new paper, load it
into the printer and do a Master Balance Test. When the
Master Balance Test is on aim, the “Normal” has been
set up.
3. The new paper may be different in “Under” and “Over”
characteristics (slope). Print the “Under” and “Over”
Printer Setup Negatives on the new paper, using the
same channel as in Step 1. Identify these prints as “Test
Print—Normal,” “Test Print—Under,” and “Test
Print—Over.” If the Under and Over test prints match
the Under and Over reference prints, no further
adjustment is needed. If the test prints do not match the
reference prints, proceed to “Setting the Paper Slope.”
Method 2:
1. When your supply of EKTACOLOR Edge 7/
ROYAL VII Paper is about to run out, print the Printer
Setup Negative “Normal,” “Under,” and “Over” on the
channel most commonly used for the paper. Label the
three prints “Old-Paper Reference Print—Normal,”
“Old-Paper Reference Print—Under,” and “Old-Paper
Reference Print—Over.”
2. Take densitometer readings from the Normal reference
print; this will be your aim.
3. Load the new paper, and make prints from the
“Normal,” “Under,” and “Over” Printer Setup Negative.
Be sure to use the same channel as in Step 1. Identify
these prints as “Test Print—Normal,” “Test Print—
Under,” and “Test Print—Over.”
4. Read and record the test-print densities. Calculate the
correction as follows: