


Matchprint Professional Server Network Guide for Windows 2000
2003 Kodak Polychrome Graphics. All rights reserved. Page 14 of 23
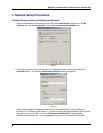
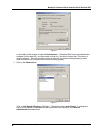
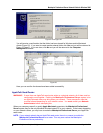
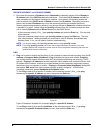
To create a new folder, navigate to and select the drive or sub-folder you want to create the new
folder in. It usually is best to create a shared folder at the top level of a drive. In Figure 16 above
the Local Disk (C:) is selected. Click on the New Folder button.
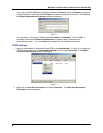
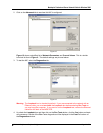
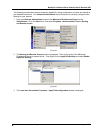
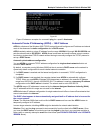
Figure 17 Figure 18 Figure 19
A new folder is created as in Figure 17 above. The name of the folder is already highlighted to
allow you to type a new name. Type in the name you want the folder to have (Figure 18) and press
Enter to finish. Then click on the icon of the folder to highlight the folder (Figure 19). The new
name should appear in the Folder: box before clicking OK (Figure 19). Click OK to return to the
Create Shared Folder window. (Figure 20)
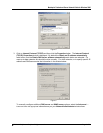
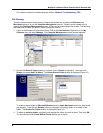
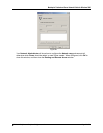
4. Type the Share name: in the box (Figure 20). This is the name of the folder as it will appear to
client computers. If you have checked the Apple Macintosh box the name will appear in both as
you type.
Figure 20
You may have a different name for Windows and Macintosh, but to simplify leave both the same so
you know they are both pointing to the same folder. You can also type a Share description to help
identify this particular shared folder if you have multiple shared folders defined. Click Next to
continue.
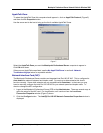
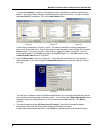
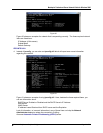
5. The default permissions are All Users have full control. If you want to change the default
permissions, select one of the three other options according to your needs.
If these default permissions are correct, click Finish to complete the set up of this shared folder.