


3
Setting Up Network Printing
3-20 IC-204
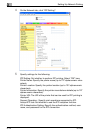
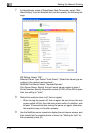
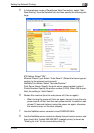
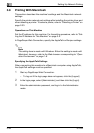
IPX Setting: Select “ON”.
Ethernet Frame Type: Select “Auto Detect”. (Select the frame type ac-
cording to the network environment.)
NetWare Print Mode: Select “Pserver”.
Print Server Name: Specify the print server name created in step 4.
Print Server Password: Specify only when setting from the NetWare
server. (Displayed by “----”.)
Polling Interval: Specify “1”. (Change as necessary.)
Bindery/NDS Setting: Select “NDS/Bindery Setting”.
File Server Name: Specify the name of the file server that connects to
the Pserver.
7 Restart this machine (turn the main power off, then on again).
– When turning the power off, then on again, be sure to turn the sub-
power switch off first, then the main power switch. In addition, wait
at least 10 seconds before turning the power on again; otherwise,
this machine may not function properly.
8 Use the NetWare server console to load MONITOR.NLM.
9 Select the connection information and, in the active connection col-
umn, check that the created Pserver is connected.
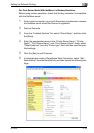
For NetWare 4.x Remote Printer Mode (NDS)
1 Log on to NetWare as an administrator from a client computer.
2 Start up NWadmin.
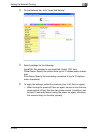
3 Select either the organization or organizational unit container that of-
fers the print service, and then click “Print Services Quick Setup” on
the “Tools” menu.
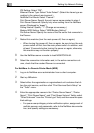
4 Enter the appropriate names in the “Printer Server Name”, “Printer
Name”, “Print Queue Name”, and “Print Queue Volume” fields, select
“Other/Unknown” from the “Printer type” field, and then save the spec-
ified settings.
– For queue user privileges, printer notification option, assignment of
multiple queues, and passwords, refer to the NetWare documenta-
tion, and specify settings as necessary.