30
Replacing the Lens and Field Calibration
3
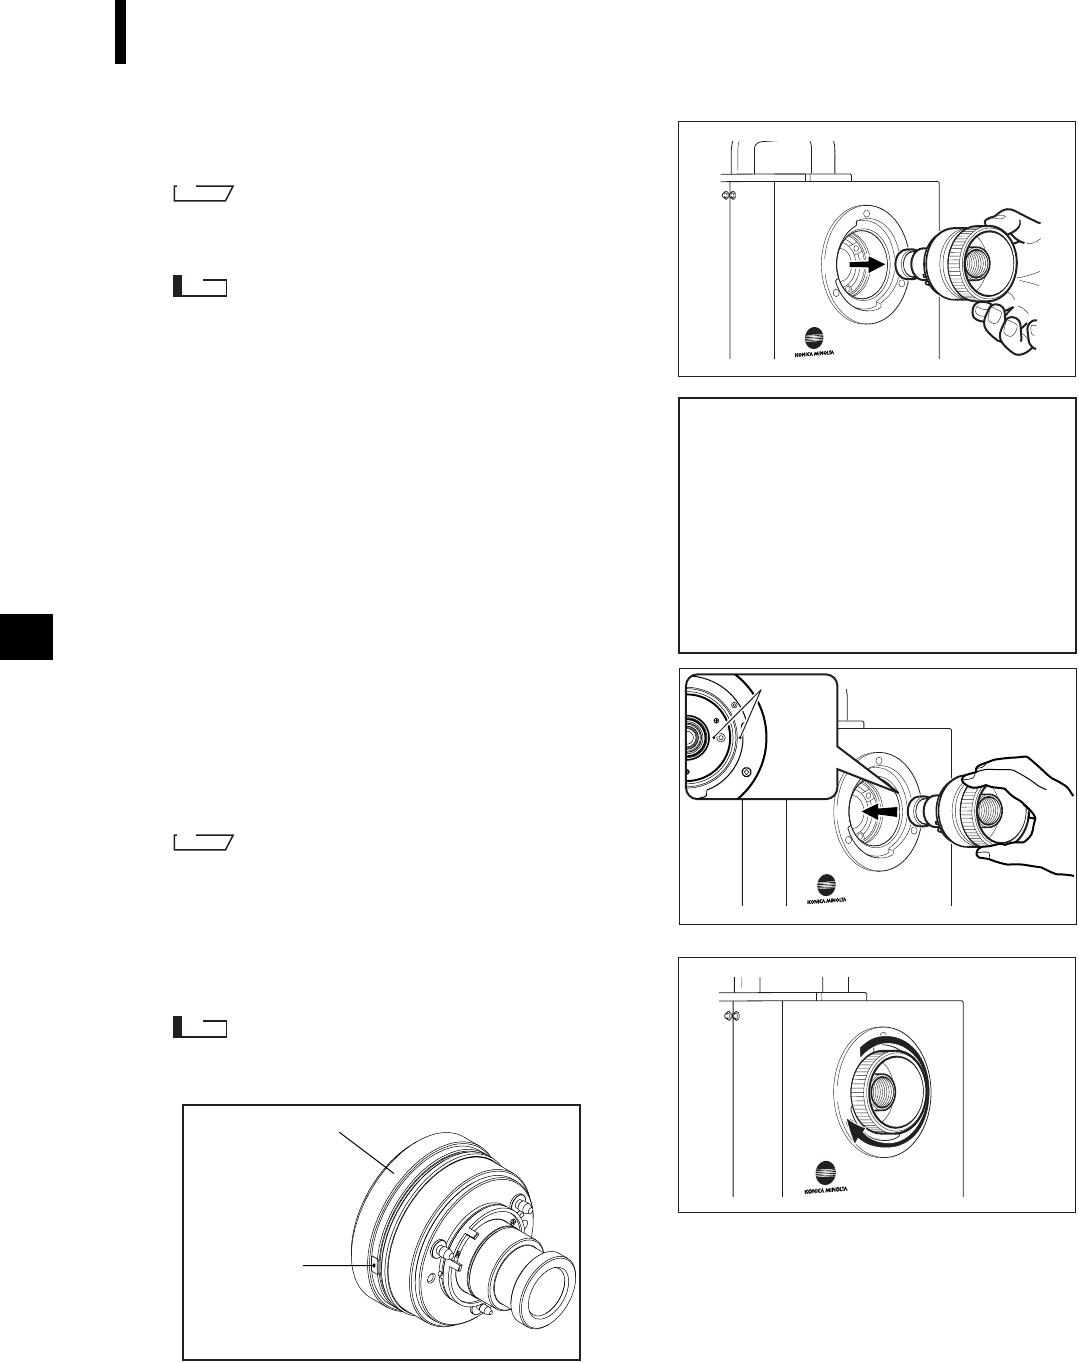
Hold the external edge of the fixing ring and
pull it out.
M
emo
Hold the ring with your finger located near the red mark on
the lens. This will facilitate pulling the lens.
Note
Attach the lens cap to the removed lens, place it in the lens
case and keep it in a safe place.
The following information will appear in the viewfind-
er as shown on the right.
4
Attach the desired lens.
• Remove the lens cap.
• Align the red mark on the lens with the one on the
lens mount socket, and insert the lens until a click is
heard.
M
emo
Hold the ring with your finger located near the red mark on
the lens. This will facilitate inserting the lens.
5
Turn the lens fixing ring clockwise to secure
the lens.
Note
After tightening the lens, make sure that the red mark on
the ring is aligned with the red mark on the body.
CHANGE LENS
S/N 2001005
PRESS ANY KEY
AND SCAN FIELD
CALIBRATION SYSTEM
Red
mark
Tightening ring
Red mark
Vivid910-hard-E.book Page 30 Monday, October 18, 2004 3:11 PM


