


NetWare Configuration PCONSOLE Print Queues
5-3
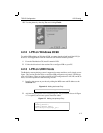
To create a print queue with the Quick Setup option:
1 Start the NetWare Administrator.
2 In the Directory Tree windows, select the context in which to install the printer.
3 From the Menu Bar, select Tools: Print Services Quick Setup.
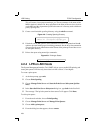
4 In the Print Server Name field, enter the name of your MPS (viewable by entering
the Show Server command at the Local> prompt).
5 In the Printer Name field, enter the name of the desired print service configured on
your MPS. For example, MPS_xxxxxx_TEXT.
6 In the Print Queue Name field, enter the name of the print queue to create. The
name should be meaningful to you; it will not affect MPS configuration.
7 Click Create.
8 Reboot the MPS.
5.4 PCONSOLE Print Queues
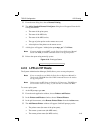
1 Log in as Admin on the file server you will be changing.
2 At the prompt, type PCONSOLE to start the utility.
For example, if your file server is mapped to the F: drive, you would use the F:
prompt.
3 From the main menu, choose Quick Set-Up.
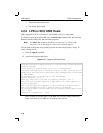
4 When prompted by PCONSOLE, enter the information with which to configure the
print queue.
❍ The print server name (MPS_xxxxxx),
❍ The new printer name (service name, such as MPS_xxxxxx_TEXT),
❍ The new print queue name, and
❍ The print queue volume (the name of the file server from which the printer re-
ceives print requests).
The remaining fields can be left in their default settings.
5 Press the F10 key to save the print queue information.
6 Reboot the MPS.