


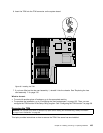

9. Connect cables depending on your specic server conguration. See “Mini-SAS to mini-SAS signal
cable connections” on page 38.
10. Reinstall the riser card assembly 1. See “Replacing the riser card assembly 1” on page 135.
What to do next:
• To work with another piece of hardware, go to the appropriate section.
• To complete the installation, go to “Completing the parts replacement” on page 152
. Then, you might
need to congure RAID for your server. See “Conguring RAID” on page 64.
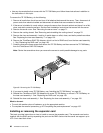
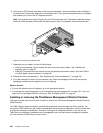
Removing the expander card
Attention: Do not open your server or attempt any repair before reading and understanding “Safety information”
on page iii and “Guidelines” on page 69.
This topic provides instructions on how to remove the expander card.
Attention:
• The server must have a RAID card and an expander card installed to support more than eight hard
disk drives.
• Ensure that you back up your data before removing the expander card because you might need to
recongure RAID and reinstall the operating system after removing the expander card.
Before you begin, print all the related instructions or ensure that you can view the PDF version on another
computer for reference.
Notes:
• The card might look slightly different from the illustrations in this topic.
• Use any documentation that comes with the expander card and follow those instructions in addition to
the instructions in this topic.
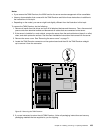
To remove the expander card, do the following:
1. Remove all media from the drives and turn off all attached devices and the server. Then, disconnect all
power cords from electrical outlets and disconnect all cables that are connected to the server.
2. If the server is installed in a rack cabinet, remove the server from the rack cabinet and place it on a at,
clean, and static-protective surface. See the Rack Installation Instructions that comes with the server.
3. Remove the server cover. See “Removing the server cover” on page 71.
4. Remove the cooling shroud. See “Removing and reinstalling the cooling shroud” on page 76.
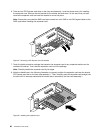
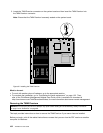
5. Remove the riser card assembly 1 and lay it upside down on a at, clean, and static-protective surface.
See “Replacing the riser card assembly 1” on page 135
.
Chapter 6. Installing, removing, or replacing hardware 99