


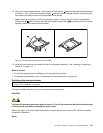
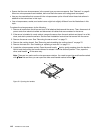
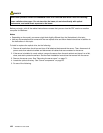
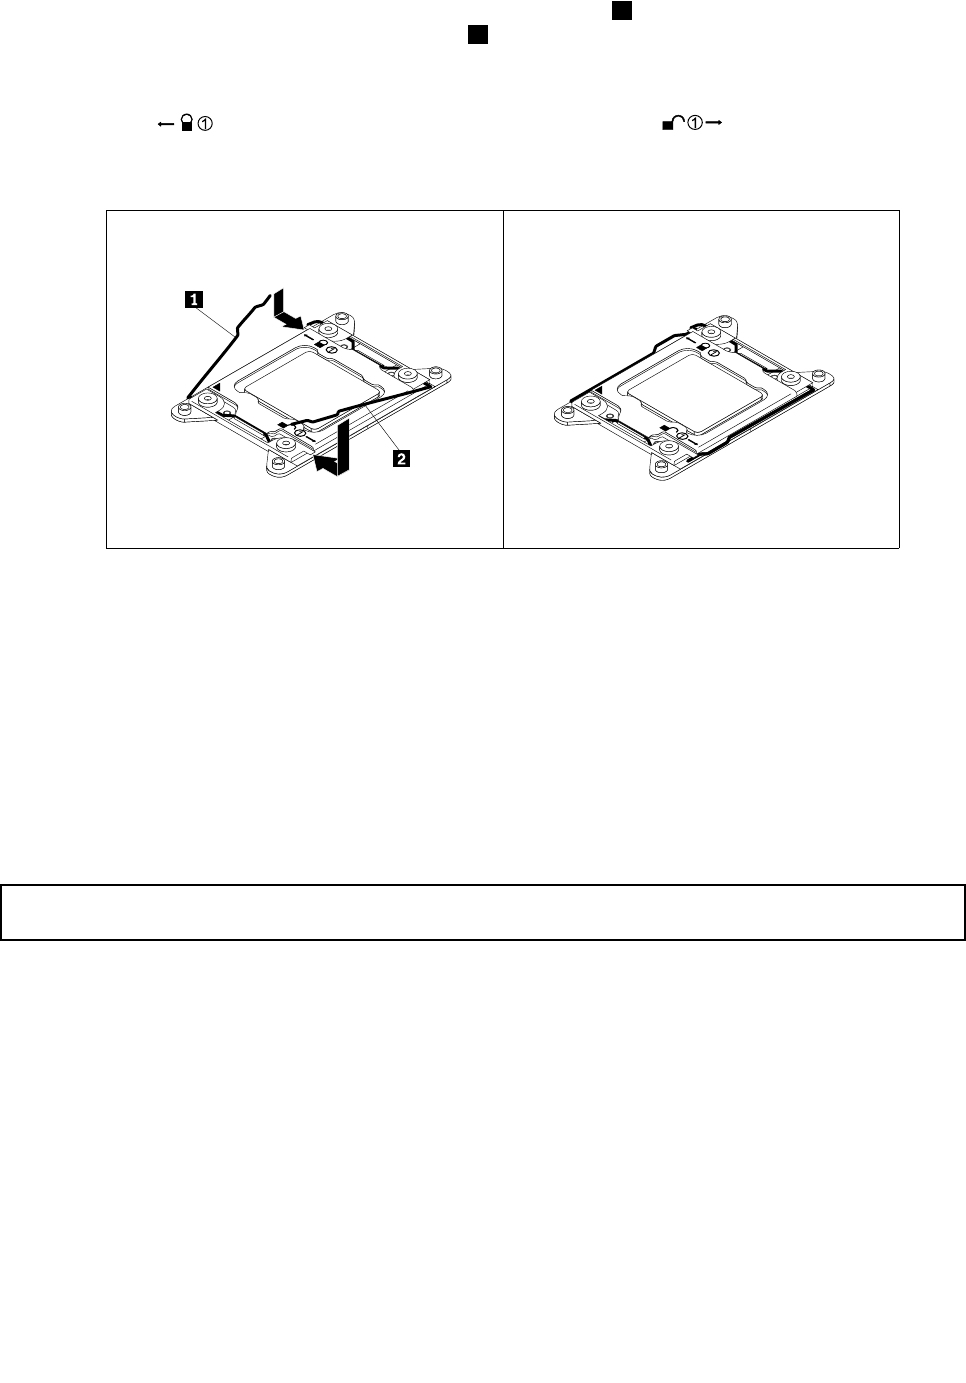
12. Close the microprocessor retainer. Press down the small handle 1 rst and then push the handle inward
to secure it. Then, press down the small handle 2 and then push the handle inward to lock the retainer
into position and secure the new microprocessor in the socket.
Note: There are two marks on the microprocessor retainer. Ensure that you close the small handle
marked with
rst and then close the small handle marked with . Always follow the correct
sequence when you close the small handles.
Figure 84. Securing the microprocessor in the socket
13. Reinstall the heat sink. See “Installing or replacing a heat sink” on page 111.
14. If you are instructed to return the old microprocessor, follow all packaging instructions and use any
packaging materials that are supplied to you for shipping.
What to do next:
• To work with another piece of hardware, go to the appropriate section.
• To complete the replacement, go to “Completing the parts replacement” on page 152.
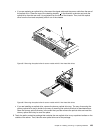
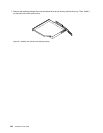
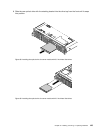
Installing or replacing the optical drive
Attention: Do not open your server or attempt any repair before reading and understanding “Safety information”
on page iii and “Guidelines” on page 69.
This topic provides instructions on how to install or replace the optical drive.
CAUTION:
When laser products (such as CD-ROMs, DVD drives, ber optic devices, or transmitters) are
installed, note the following:
• Do not remove the covers. Removing the covers of the laser product could result in exposure to
hazardous laser radiation. There are no serviceable parts inside the device.
• Use of controls or adjustments or performance of procedures other than those specied herein
might result in hazardous radiation exposure.
Chapter 6. Installing, removing, or replacing hardware 121