Attention
Do not open your computer or attempt any repair before reading and understanding the “Important safety information”
in the ThinkStation Safety and Warranty Guide that came with your computer. To obtain a copy of the ThinkStation
Safety and Warranty Guide, go to:
http://www.lenovo.com/support.
This section provides information about how to move and replace the power supply.
To replace the power supply, do the following:
1. Remove the computer cover and then lay the computer on its side. See “Removing the cover” on
page 78.
2. Locate the power supply. See “Locations” on page 79.
3. Disconnect the power supply cables from the system board connectors. Disconnect the power supply
cables from all adapter cards (some models) and from all drives.
4. Remove the power supply cables from the cable clips and ties.
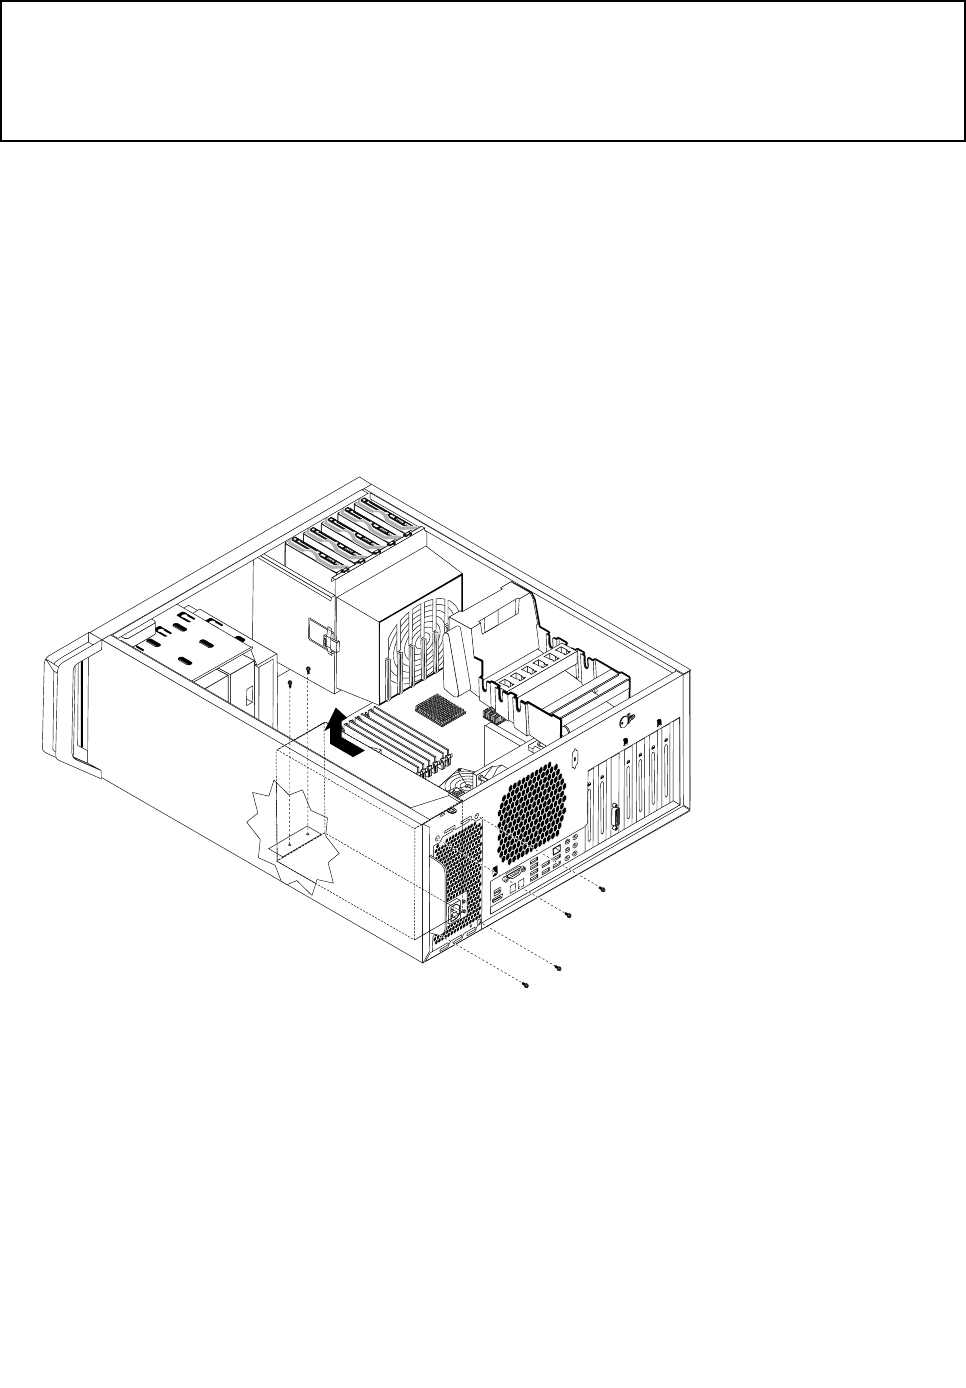
5. Remove the six power supply retaining screws at the rear of the chassis and inside the chassis.
6. Slide the power supply assembly toward the front of the computer and lift it out from the chassis.
7. Ensure that the new power supply is the correct replacement. Some power supplies automatically
sense the voltage, some power supplies are voltage specic, and some power supplies have a
voltage-selection switch. If there is a voltage-selection switch, use a ballpoint pen to slide the switch, if
necessary.
Note: For models that have a voltage-selection switch:
• If the voltage supply range is 100–127 V AC, set the switch to 115 V.
• If the voltage supply range is 200–240 V AC, set the switch to 230 V.
8. Install the new power supply into the chassis so that the screw holes in the power supply align with
those in the chassis.
Chapter 11. Replacing FRUs (Type 4155, 4158, 4218) 115
