


• Use any documentation that comes with the microprocessor option kit and follow those instructions in
addition to the instructions in this topic.
• Your microprocessor, socket, and socket cover might look slightly different from the illustrations in this
topic.
To replace a microprocessor, do the following:
1. Remove all media from the drives and turn off all attached devices and the computer. Then, disconnect
all power cords from electrical outlets and disconnect all cables that are connected to the computer.
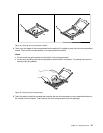
2. Remove the computer cover. See “Removing the computer cover” on page 64.
3. Place the computer on its side to gain easier access to the system board.
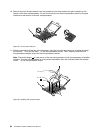
4. Remove the heat sink and fan assembly. See “Replacing the heat sink and fan assembly” on page 78.
5. Locate the correct microprocessor socket on the system board . See “Replacing the system board”
on page 99.
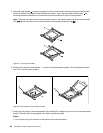
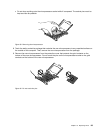
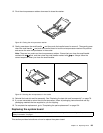
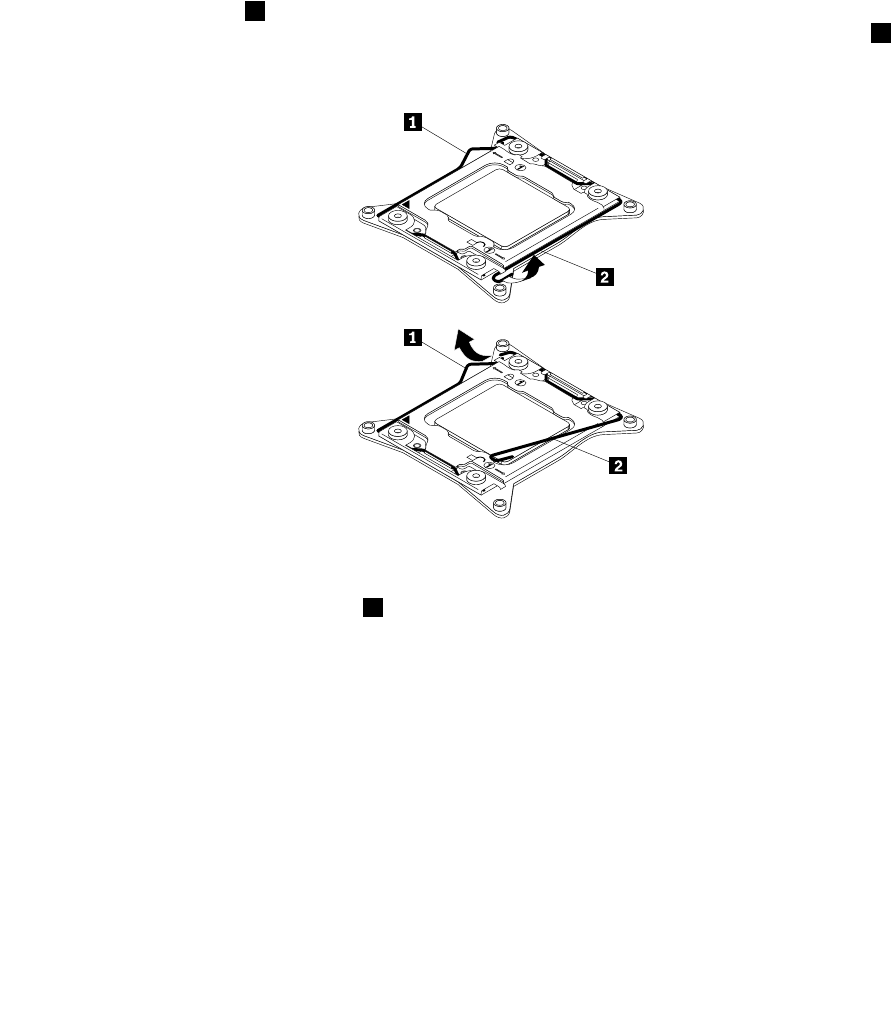
6. Open the small handle 2 by gently pressing down the small handle, and then pulling the small handle
a little bit outward to release it from the secured position. Then, open the other small handle 1 by
following the same instructions. Ensure that the small handles are in the fully open position.
Figure 44. Opening the handles
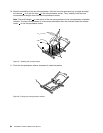
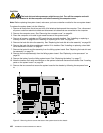
7. Gently press down the small handle 2 to open the microprocessor retainer. Pivot the retainer upward
until it is in the fully open position.
96 ThinkStation Hardware Maintenance Manual