CAUTION:
The heat sink and microprocessor might be very hot. Turn off the computer and wait
three to ve minutes to let the computer cool before removing the computer cover.
Note: Before replacing the system board, make sure you have a retention module for the new system board.
To replace the system board, do the following:
1. Remove all media from the drives and turn off all attached devices and the computer. Then, disconnect
all power cords from electrical outlets and disconnect all cables that are connected to the computer.
2. Remove the computer cover. See “Removing the computer cover” on page 64.
3. Place the computer on its side to gain easier access to the system board.
4. Remove all memory modules and PCI cards that are currently installed. See “Installing or replacing a
memory module” on page 69 and “Installing or replacing a PCI card” on page 66.
5. Remove the hard disk drive fan assembly. See “Replacing the hard disk drive fan assembly” on page 80.
6. Remove the hard disk drive enablement module if it is installed. See “Installing or replacing a hard disk
drive enablement module” on page 87.
7. Remove the heat sink and fan assembly from the failing system board. See “Replacing the heat sink and
fan assembly” on page 78.
8. Remove the microprocessor(s) from the failing system board. See “Replacing a microprocessor” on
page 95
.
9. Remove the battery from the failing system board. See “Replacing the battery” on page 77.
10. Note the location of all cable connections on the system board and disconnect all cables. See “Locating
parts on the system board” on page 58.
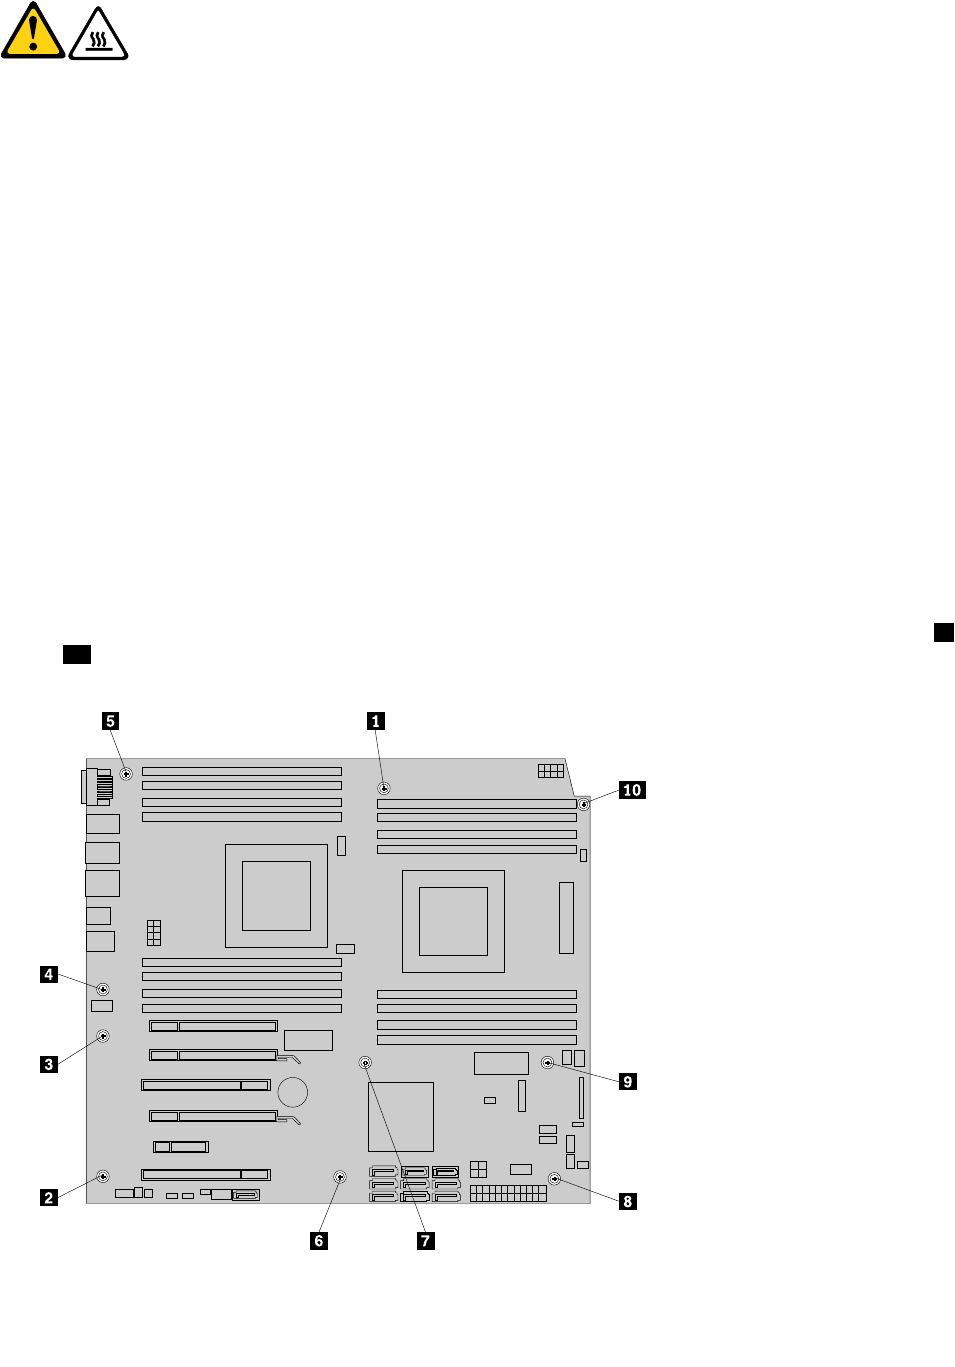
11. Remove the ten screws that secure the system board to the chassis by following the sequence from 1
to 10 .
Figure 51. Removing the ten screws that secure the system board to the chassis
100 ThinkStation Hardware Maintenance Manual


