


LINDY CPU Switch Dual Junior Installation and Use Page 14
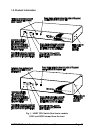
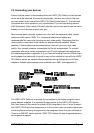
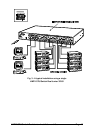
2.3 Connecting your devices
Ensure that the power is disconnected from the LINDY CPU Switch and all devices
which are to be attached. Connect any keyboards, monitors and mice to the user
port connectors at the rear of the LINDY CPU Switch (see figure 2). The individual
connectors are colour coded for your convenience. If you are connecting several
KVM (Keyboard, Video monitor, Mouse) sets then you do not need to use the same
brands or mix of devices on each user port.
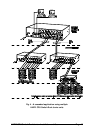
Next connect each computer system unit in turn with the keyboard cable, mouse
cable and video cable. LINDY 3-in-1 keyboard/video/mouse cables are
recommended for maximum convenience and video quality. Remember that the
video quality is maximised if the cables are kept as short as possible. Where
possible, 2 metre cables are recommended as these will give very high video
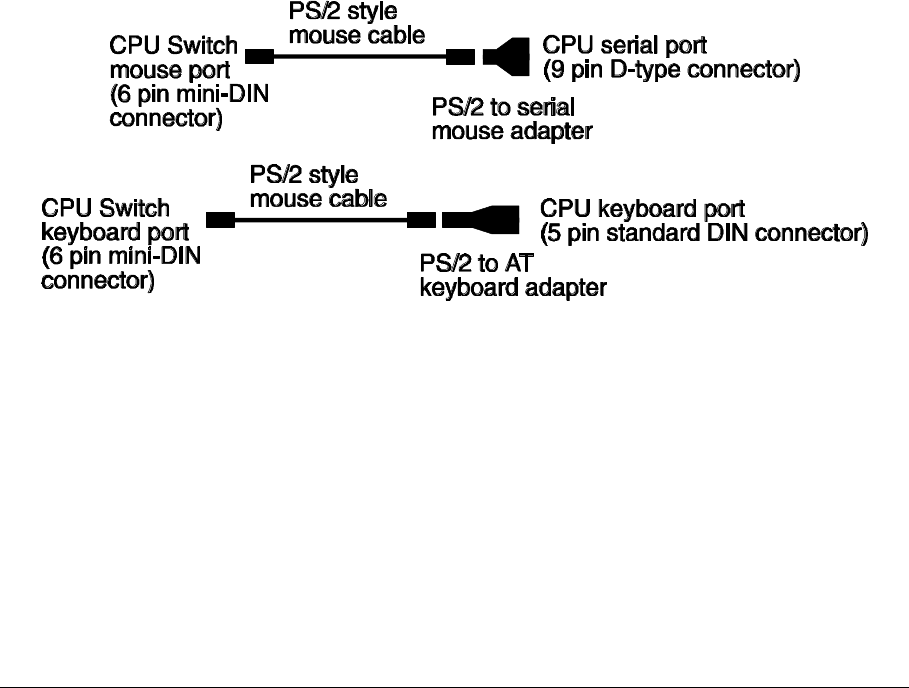
quality. Any unused computer connections can be left unconnected. To connect
computers with serial mouse connections and AT style keyboard connections use
the adapters specified in appendix A. If you have an existing 6-pin mini-DIN to 9-pin
serial adapter that came with a mouse it may not be suitable for use with the LINDY
CPU Switch as the are several different standard wiring configurations for these
adapters. Suitable serial adapters are available from LINDY (see appendix A)
The LINDY CPU Switch is now ready for connection to the mains using the mains
power adapter supplied. It is important to apply power to the LINDY CPU Switch
first, then power on the monitor and each of the computers in turn. Failure to switch
the LINDY CPU Switch and computers on in the correct order can lead to the mouse
and/or keyboard not being recognised by the computers when they are switched on.
There is no ON/OFF switch and the LINDY CPU Switch will start to operate as soon
as the power is applied.