


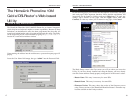
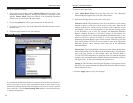

7. Unless you already have a DHCP server on your internal network, choose
Enable from the DHCP Server field. By choosing Enable, you will con-
figure the HomeLink Phoneline Router to automatically assign IP address-
es to each of your PCs. In the Number of DHCP Users box, enter the num-
ber of PCs you plan on networking to the HomeLink Phoneline Router, or
leave it alone. Don’t forget to change this number if, in the future, you add
more PCs to your network.
8. Click the Apply button, then click the Continue button.
9. Reset the power on the cable or DSL modem, then restart the computer
so the computer can obtain the new HomeLink Phoneline Router’s IP infor-
mation.
Your HomeLink Phoneline Router is now configured to your network.
Please continue to the following section to complete your network setup.
Now that the HomeLink Phoneline Router is configured, you will have to con-
figure your other PCs to accept the IP addresses that the HomeLink Phoneline
Router will provide.
These instructions apply only to Windows 95, 98, and ME
machines. For TCP/IP setup under Windows NT and 2000, please
refer to your Windows manual.
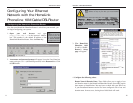
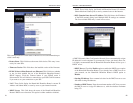
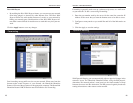
1. Click the Start button, select Settings, then click on Control Panel.
2. Double-click the Network icon.
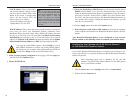
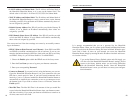
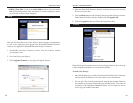
LAN IP Address These values refer to
your internal network settings. Unless
you have specific internal needs, there
should be no reason to change these
values. For the internal LAN, the
default values are as follows.
• Private IP Address: 192.168.1.1
• Subnet Mask: 255.255.255.0
WAN IP Address These values refer to the outside network you connect to
every time you access your Broadband Internet connection. Most
Broadband ISPs assign their clients with a different IP address each time
they log on. If this is the case with your ISP, click Obtain an IP Address
Automatically and continue to step 5. If your ISP assigns you a fixed IP
address, click Specify an IP Address and enter the address into the Subnet
Mask, Default Gateway Address and DNS fields provided by the ISP.
If you need to enable PPPoE support, choose Enable. If you do
enable PPPoE, remember to remove any existing PPPoE applica-
tions already on your computer. (More information on PPPoE can
be found in the Setup section for the Web-based Utility.)
5. When you have properly configured the Setup page, click the Apply but-
ton, then click the Continue button.
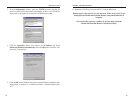
6. Choose the DHCP tab.
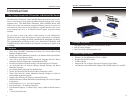
Phoneline 10M Cable/DSL Router
14
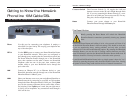
Configuring Your Windows 95 & 98 PCs to Connect
to the HomeLink Phoneline Router
13
HomeLink™ Series
NNoottee::
If you have an existing DHCP
server on your LAN and you don’t
wish to use the HomeLink Phoneline
Router as your new DHCP server, you
must assign Router a static IP
address. The Router’s IP address
must be compatible with your existing
network. You can not have two DHCP
servers running on one LAN at the
same time.