33
Chapter 6: Configuring the Wireless-G Media Storage Link Router
The Storage Tab - Share
Wireless-G Media Storage Link Router with SpeedBooster
The Storage Tab - Share
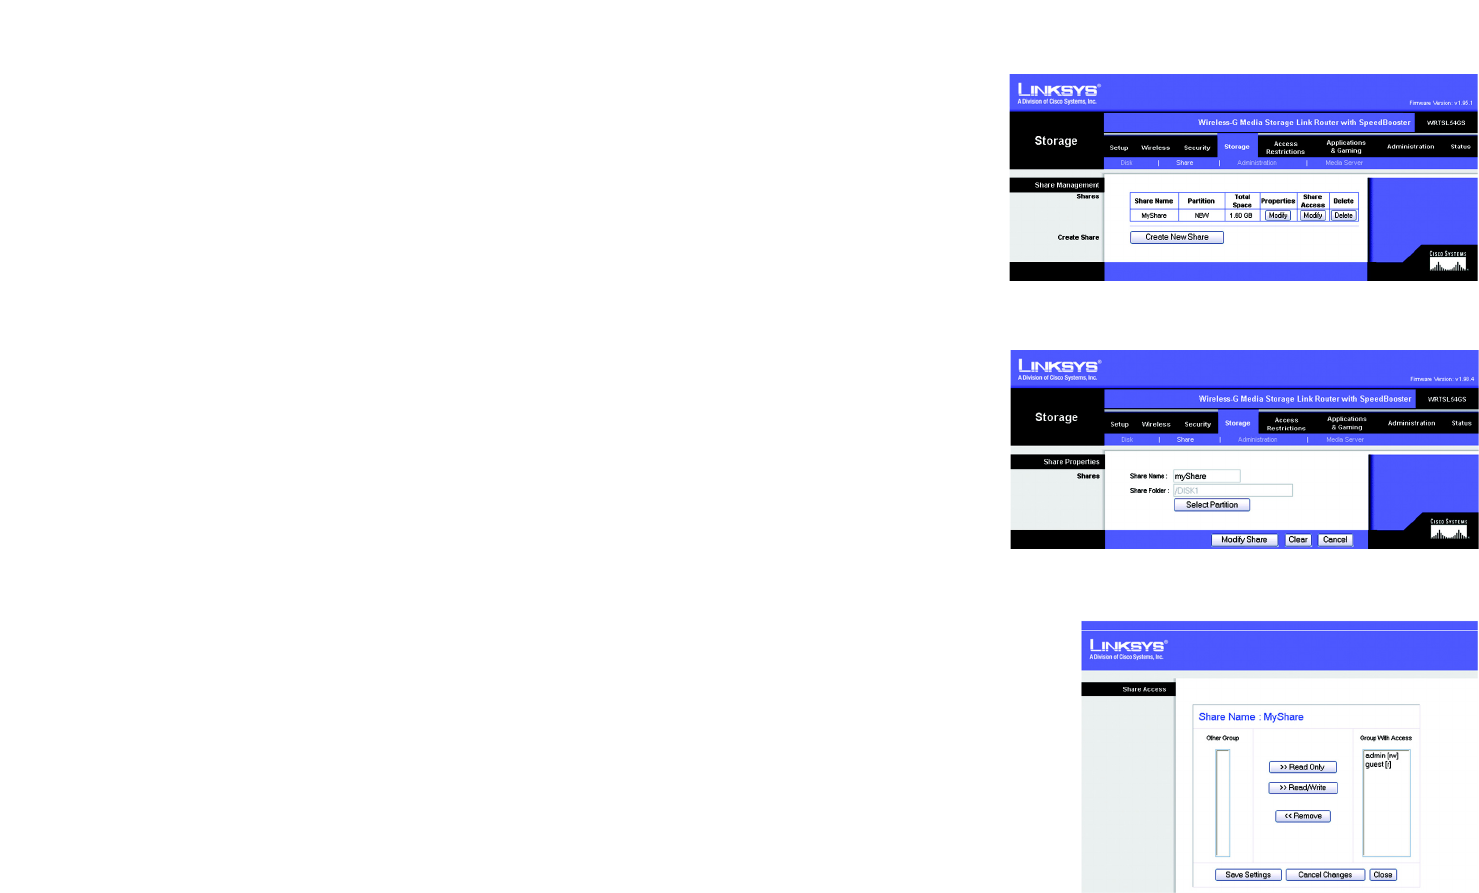
Shares control access to the partition(s) of the disk attached to the Router. The Share screen describes the
current shares. Using this screen, you can create new shares, modify share properties, or delete shares.
Share Management
Shares
The Share Name, Partition, and Total Space columns describe the shares.
Properties - Modify. Click the Modify button to change the properties of a share. On the Share Properties
screen, enter a different name for the share, and click the Select Partition button to select a partition to share.
The name of the share will be automatically displayed in the Share Folder field. Click the Modify Share button to
save the new properties, or click the Clear button to clear the changes. Click the Cancel button to cancel the
changes.
Share Access - Modify. Click the Modify button to change the access privileges of a share. On the Share Access
screen, groups with no access are listed in the Other Group column, and groups with access are listed in the
Group with Access column. To give a group read-only access, select the group, and click the >> Read Only
button. To give a group read/write access, select the group, and click the >> Read/Write button. To strip a group
of its current access privileges, select the group, and click the << Remove button. Click the Save Settings
button to save the changes, or click the Cancel Changes button to cancel the changes. Click the Close button to
exit the Share Access screen.
Delete. Click the Delete button to remove a share.
Create Share
Create New Share. Click the Create New Share button to create a new share. On the Share Properties screen,
enter a name for the share, and click the Select Partition button to select a partition to share. The name of the
share will be automatically displayed in the Share Folder field. Click the Create Share button to save the new
properties, or click the Clear button to clear the changes. Click the Cancel button to cancel the changes.
Figure 5-35: Storage Tab - Share
Figure 5-36: Share Properties
Figure 5-37: Share Access
