58
7521
7521
Plus / N N/B MAINTENANCE
Plus / N N/B MAINTENANCE
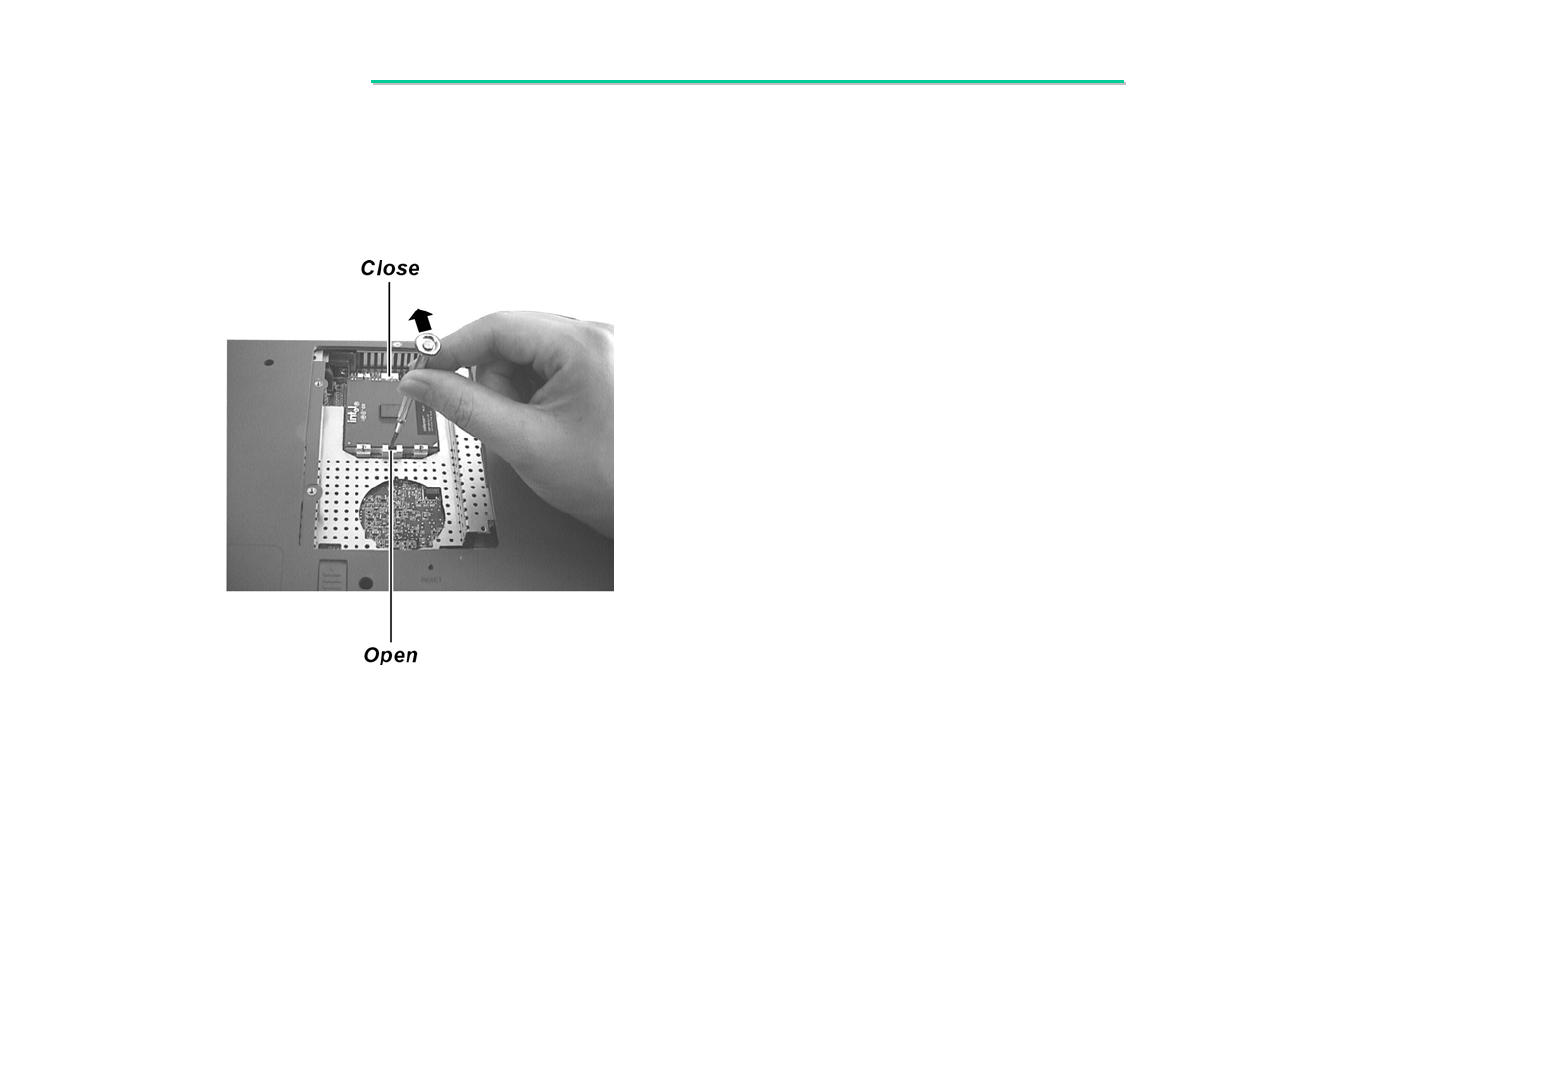
4. Insert a minus screwdriver 101 (JIS standard) into the “OPEN” hole of the socket,
and push the screwdriver toward the CPU to free the CPU. Now you can take out the CPU
from the socket. (figure 2-4)
Figure 2-4
Reassembly
1. Align the arrowhead corner of the CPU with the beveled corner of the socket, and insert the CPU pins
into the holes. Insert the flat screwdriver into the “CLOSE” hole of the socket, and push the screwdriver
toward the CPU to secure the CPU in place.
2. Connect the fan’s power cord to the system board, fit the heatsink onto the top of the CPU
and secure with four screws.
3. Replace the CPU compartment cover and secure with two screws.


