


9
MAN-RCKPC-001 MC100 Series Rack Mount Computer
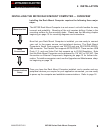
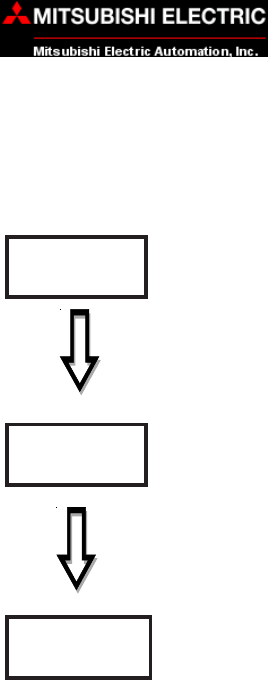
Installing the Rack Mount Computer requires the following three major
steps:
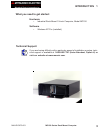
The MC100 Rack Mount Computer is a rack mount unit with handles for easy
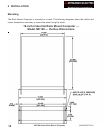
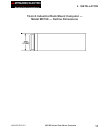
removal and portability. Mounting of the unit requires drilling 4 holes in the
mounting surface for the mounting studs. Please see the Mounting chapter
beginning on page 10 for mounting diagrams and instructions.
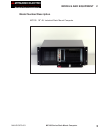
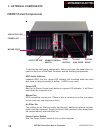
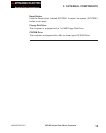
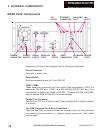
Now that your Rack Mount Computer is installed, you are ready to connect
your unit to the power source and peripheral devices. The Rack Mount
Computer’s Serial Ports support one RS-232 and one RS-232/RS-422/RS-
485 connector. The Parallel Port supports SPP/EPP/ECP. There are two USB
Ports (1.1), and one Video Port that supports up to XVGA Resolution. Note
that the Rack Mount Computer can be powered by 115 VAC or 230 VAC. See
the section on External Components, beginning on page 12 for further infor-
mation. To install an expansion card, see the Upgrades and Maintenance chap-
ter beginning on page 18.
Mount the Unit
Make
Connections
Communications
Setup
INSTALLING THE MC100 RACK MOUNT COMPUTER — OVERVIEW
Once you have the Rack Mount Computer installed, and a monitor and any
peripheral devices you require for your application connected, you are ready
to power up the computer and establish communications. Refer to page 16.
4 INSTALLATION