


28 _Getting Started
To verify your machine’s IP address or the MAC address, print a
Network Configuration page. (See "Printing a report" on page 79.)
• To find a shared network printer (UNC Path), select Shared Printer
[UNC] and enter the shared name manually or find a shared printer
by clicking the Browse button.
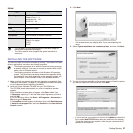
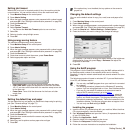
6. After the installation is finished, a window appears asking you to print a
test page.
Select the
Select the corresponding checkbox(es) and click Finish.
MACHINE'S BASIC SETTINGS
After installation is complete, you may want to set the machine's default
settings. Refer to the next section if you would like to set or change values.
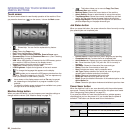
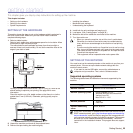
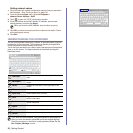
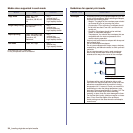
Altitude adjustment
The print quality is affected by atmospheric pressure, which is determined
by the height of the machine above sea level. The following information will
guide you on how to set your machine to the best print quality or best quality
of print.
Before you set the altitude value, find the altitude where you are using the
machine.
1. Enter your machine’s IP address as the URL in a browser and click Go
to access the web site of your machine.
2. Click Machine Settings.
3. Click Altitude Adj.
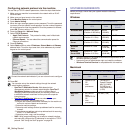
4. Select the appropriate altitude value.
5. Click Apply.
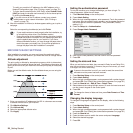
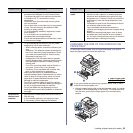
Setting the authentication password
To set your machine up or change the settings, you have to login. To
change password, follow the next steps.
1. Press Machine Setup on the control panel.
2. Press Admin Setting.
3. When the login message appears, enter password. Touch the password
input area, then the question marks appears, use the number keypad on
the control panel to enter the password. Then, press OK. (Factory
setting:1111)
4. Press the Setup tab > Authentication.
5. Press
Change Admin. Password
.
6. Enter old and new password, and then confirm the new password.
7. Press OK.
Setting the date and time
When you set the time and date, they are used in Delay fax and Delay Print,
also they are printed on reports. If, however, they are not correct, you need
to change it for correct time being.
1. Press Machine Setup on the control panel.
2. Press Admin Setting.
3. When the login message appears, enter password with number keypad
and press OK. (See "Setting the authentication password" on page 28.)
4. Press the General tab > Date & Time > Date & Time.
5. Select date and time using left/right arrows. Or touch the insert area and
use the numeric keypad on the control panel.
6. Press OK.
Changing the display language
To change the language that appears on the display, refer to the following
steps.
1. Press Machine Setup on the control panel.
2. Press Admin Setting.
3. When the login message appears, enter password with number keypad
and press OK. (See "Setting the authentication password" on page 28.)
4. Press the General tab.
5. Press the down arrow to switch the screen and press Language.
6. Select the desired language.
7. Press OK.
If you are not sure of the IP address, contact your network
administrator or print network information. (See "Printing a
report" on page 79.)
• If your machine does not work properly after the installation, try
to reinstall the printer driver. See Software section.
• During the printer driver installation process, the driver installer
detects the location information for your operating system and
sets the default paper size for your machine. If you use a
different Windows location, you must change the paper size to
match the paper you usually use. Go to printer properties to
change the paper size after installation is complete.
1 Normal
2 High 1
3 High 2
4 High 3
0
If power to the machine is cut off, you need to reset the correct time
and date once the power has been restored.
To change the format of date and time, press Date Format and Time
Format.