3. Screen Adjustment and Settings
21
3-6. Power Indicator Setting
Light off the power indicator. This function is available for the multiple panels settings.
[Procedure]
1. Select <Power Indicator> in the ScreenManager <Others> menu.
2. Select "Disable".
3-7. Displaying Lower Resolutions
The lower resolutions are enlarged to full screen automatically. Using the <Screen Size> function in the
<Others> menu enables to change the screen size.
NOTE
• When "Single Link/10bit" is selected on the <Signal Selection> menu and 10bit color signal is input (page 11), the
<Screen Size> cannot be selected. The screen is displayed in the "Normal" mode.
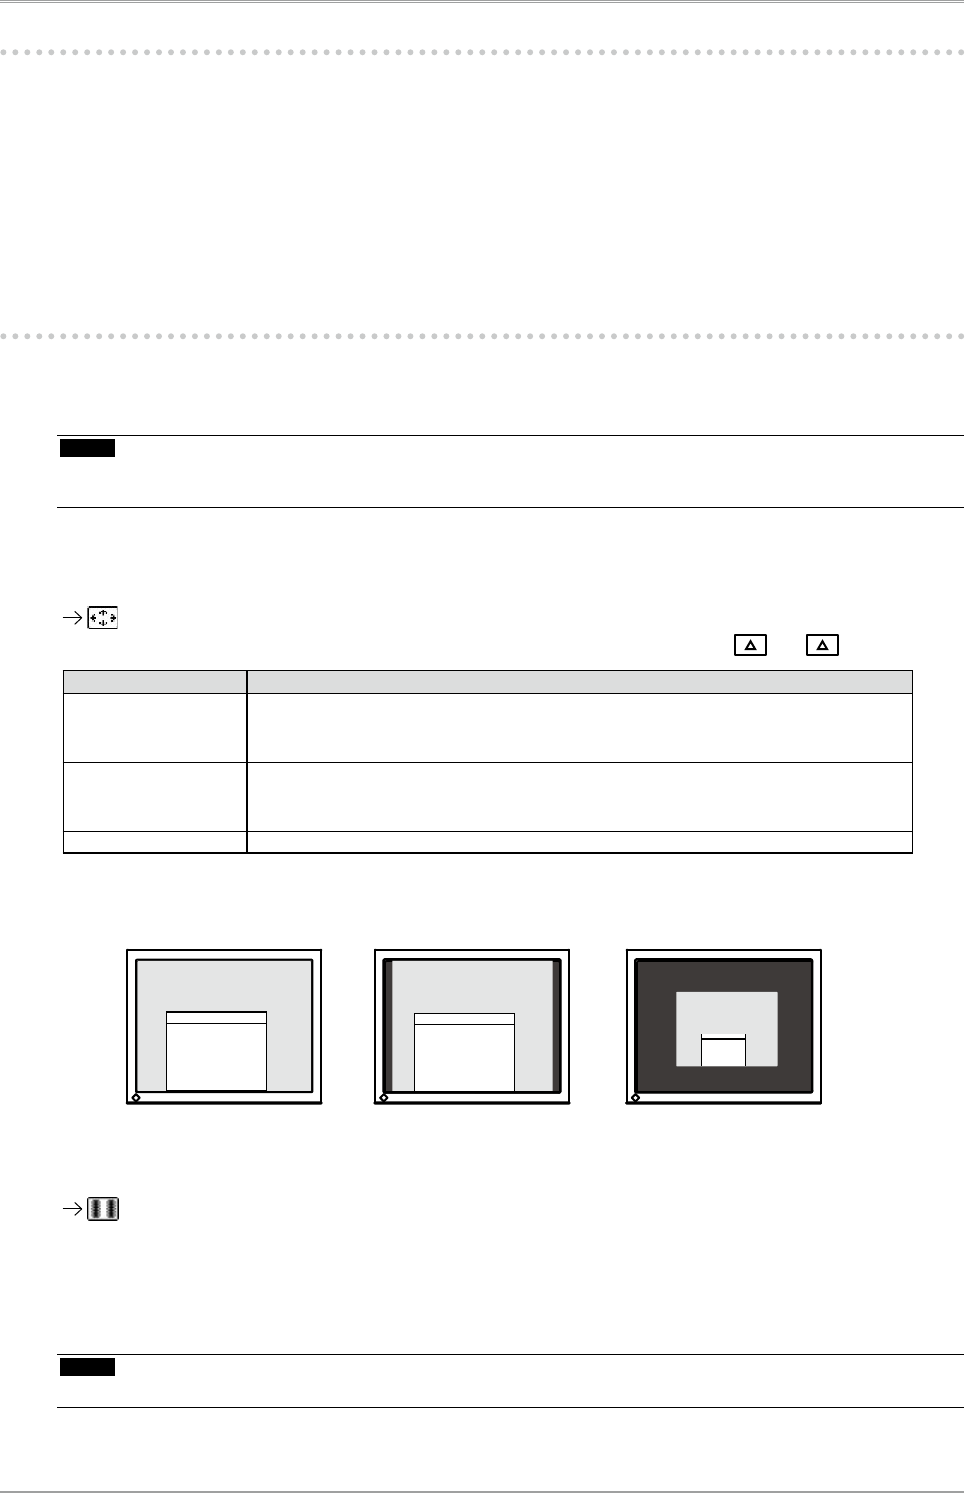
1 Enlarge the screen size when displaying a low resolution.
Select the <Screen Size>.
Select the <Screen Size> in the <Others> menu and select the screen size by using and .
Mode Function
Full Displays the picture on the screen in full, irrespective of the picture's resolution.
Since the verticalresolution and the horizontal resolution are enlarged at different
rates, some images may appeardistorted.
Enlarged Displays the picture on the screen in full, irrespective of the picture's resolution.
Since the vertical resolution and horizontal resolution are enlarged at same rates,
some horizontal or vertical image maydisappear.
Normal Displays the picture at the actual Screen resolution.
Example: Displaying Image size 1280 × 1024 when setting <Single Display> in <Display Setup>.
2 Smooth the blurred texts of the enlarged screen.
Switch the <Smoothing> setting.
When a low-resolution image is displayed in the “Full” or “Enlarged” mode, the characters or lines of the
displayed image may be blurred.
Select the suitable level from 1 - 5 (Soft - Sharp).
Select <Smoothing> in the <Screen> menu and adjust by using the right and left switches.
NOTE
• Smoothing setting may not be required depending on the display resolution. (You cannot choose the smoothing icon.
(2560× 1600)
(2000 × 1600)
(1280 × 1024)
Full (Default Setting)
Enlarged
Normal


