1. Introduction
7
Tips
• This monitor supports the Portrait/Landscape display. This function allows you to change the orientation of
the Adjustment menu when using the monitor screen in vertical display position. (Refer to “3-8. Setting the
Orientation of the Adjustment Menu” (page 22).)
• For using the monitor with “Portrait” position, the graphics board supporting portrait display is required. When
using the monitor with “Portrait” position, the setting needs to be changed depending on the graphics board used
in your PC. Refer to the manual of the graphics board for details.
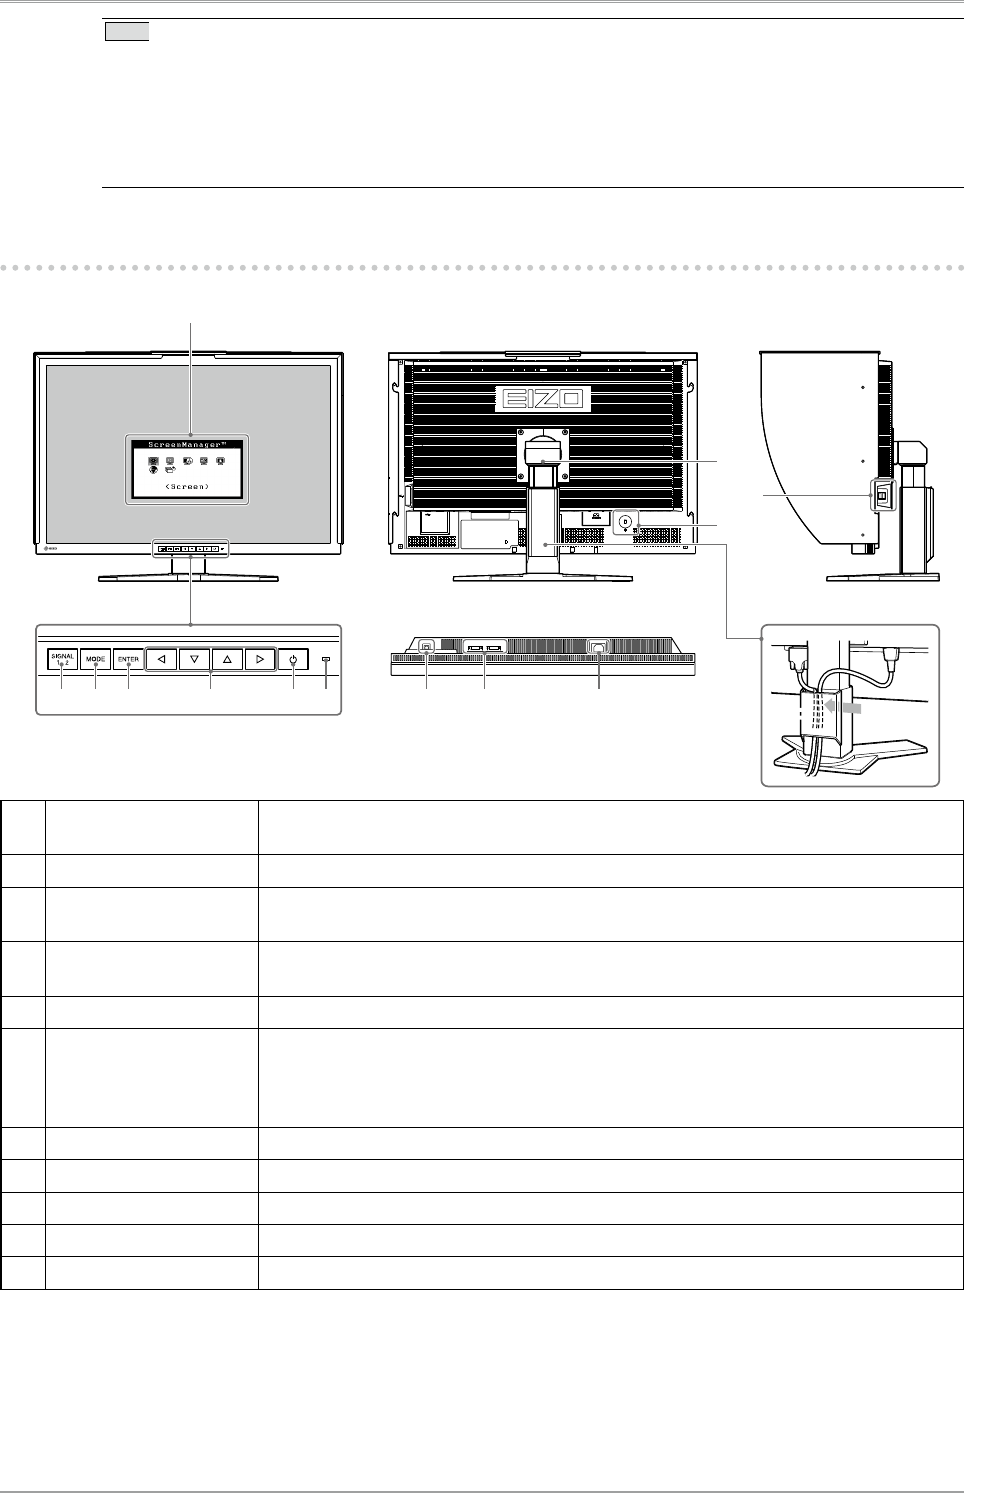
1-2. Buttons and Indicators
Adjustment menu (ScreenManager
®
*)
1 2 3 4 5 6 9 10 11
7
8
12
1 Input Signal Selection
button
Switches input signals for display when two PCs are connected to the monitor.
2 Mode button Displays the Fine Contrast menu.
3 Enter button DisplaystheAdjustmentmenu,determinesanitemonthemenuscreen,andsaves
valuesadjusted.
4 Control buttons
(Left, Down, Up, Right)
Choosesanadjustmentitemorincreases/decreasesadjustedvaluesforadvanced
adjustmentsusingtheAdjustmentmenu.
5 Power button Turns the power on or off.
6 Power indicator Indicates monitor’s operation status.
Blue: Operating Orange: Power saving Off: Power off
WhenthetimerissetforColorNavigator,notiesthatarecalibrationisrequired(for
CAL mode or EMU mode).
7 Stand Usedtoadjusttheheightofthemonitor.
8 Security lock slot Complies with Kensington’s MicroSaver security system.
9 Input signal connectors Left: DVI-D connector (SIGNAL1 DUAL LINK) / Right: DVI-D connector (SIGNAL2)
10 USB port (UP) Connects the USB cable in order to use the provided software.
11 USB port (DOWN) Connects peripheral USB devices.
*ScreenManager
®
is an EIZO's nickname of the Adjustment menu.


