


Chapter 2 Configuring and Installing the SCXI Chassis
© National Instruments Corporation 2-17 SCXI Chassis User Manual
4. Make sure the voltage of the power source is between 9.5 and 16 VDC.
5. Insert the power plug into the header J1.
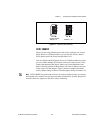
Caution Revision A SCXI-1000DC chassis have screw terminals on the rear panel to
connect the power source. Wire the power source to these screw terminals. Observe the
correct polarity, as connecting the power source with the wrong polarity can cause
permanent damage to the chassis. NI is not liable for any damage or injuries resulting from
improper power connections.
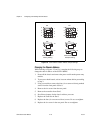
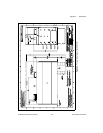
6. Install the modules into the chassis.
7. Install the necessary cabling for the modules. Consult the SCXI
module user manual for cabling installation instructions.
8. Install any needed front and rear filler panels.
9. Power on the chassis.
10. Power on the computer connected to the modules.
11. Refer to the SCXI Quick Start Guide to complete the SCXI system
installation.
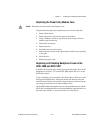
Installing Filler Panels
The front and rear filler panel accessories protect the inside of the chassis
and the installed modules by preventing unwanted material from entering
the chassis and damaging modules, or forming conductive paths that can
degrade performance. Install all modules first, then start installing filler
panels from the edge of a front panel.
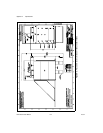
Installing Front Filler Panels
Complete the following steps to install front filler panels:
1. Place the panel with the captive screws to the right of the chassis front.
Line up the screws with the threaded strip holes.
2. Using a flathead screwdriver, screw the captive screws into the
threaded strip holes.